

Briani, or Mauritian biryani, is considered a Mauritian specialty and is of Muslim and Indian origins. This post goes into detail on how to make a perfectly executed traditional Mauritian chicken biryani without the use of a traditional biryani deg or other special pieces of equipment. I have detailed the important steps to make a foolproof chicken biryani and included extra photos so that you can have a visual of its elaborate execution.
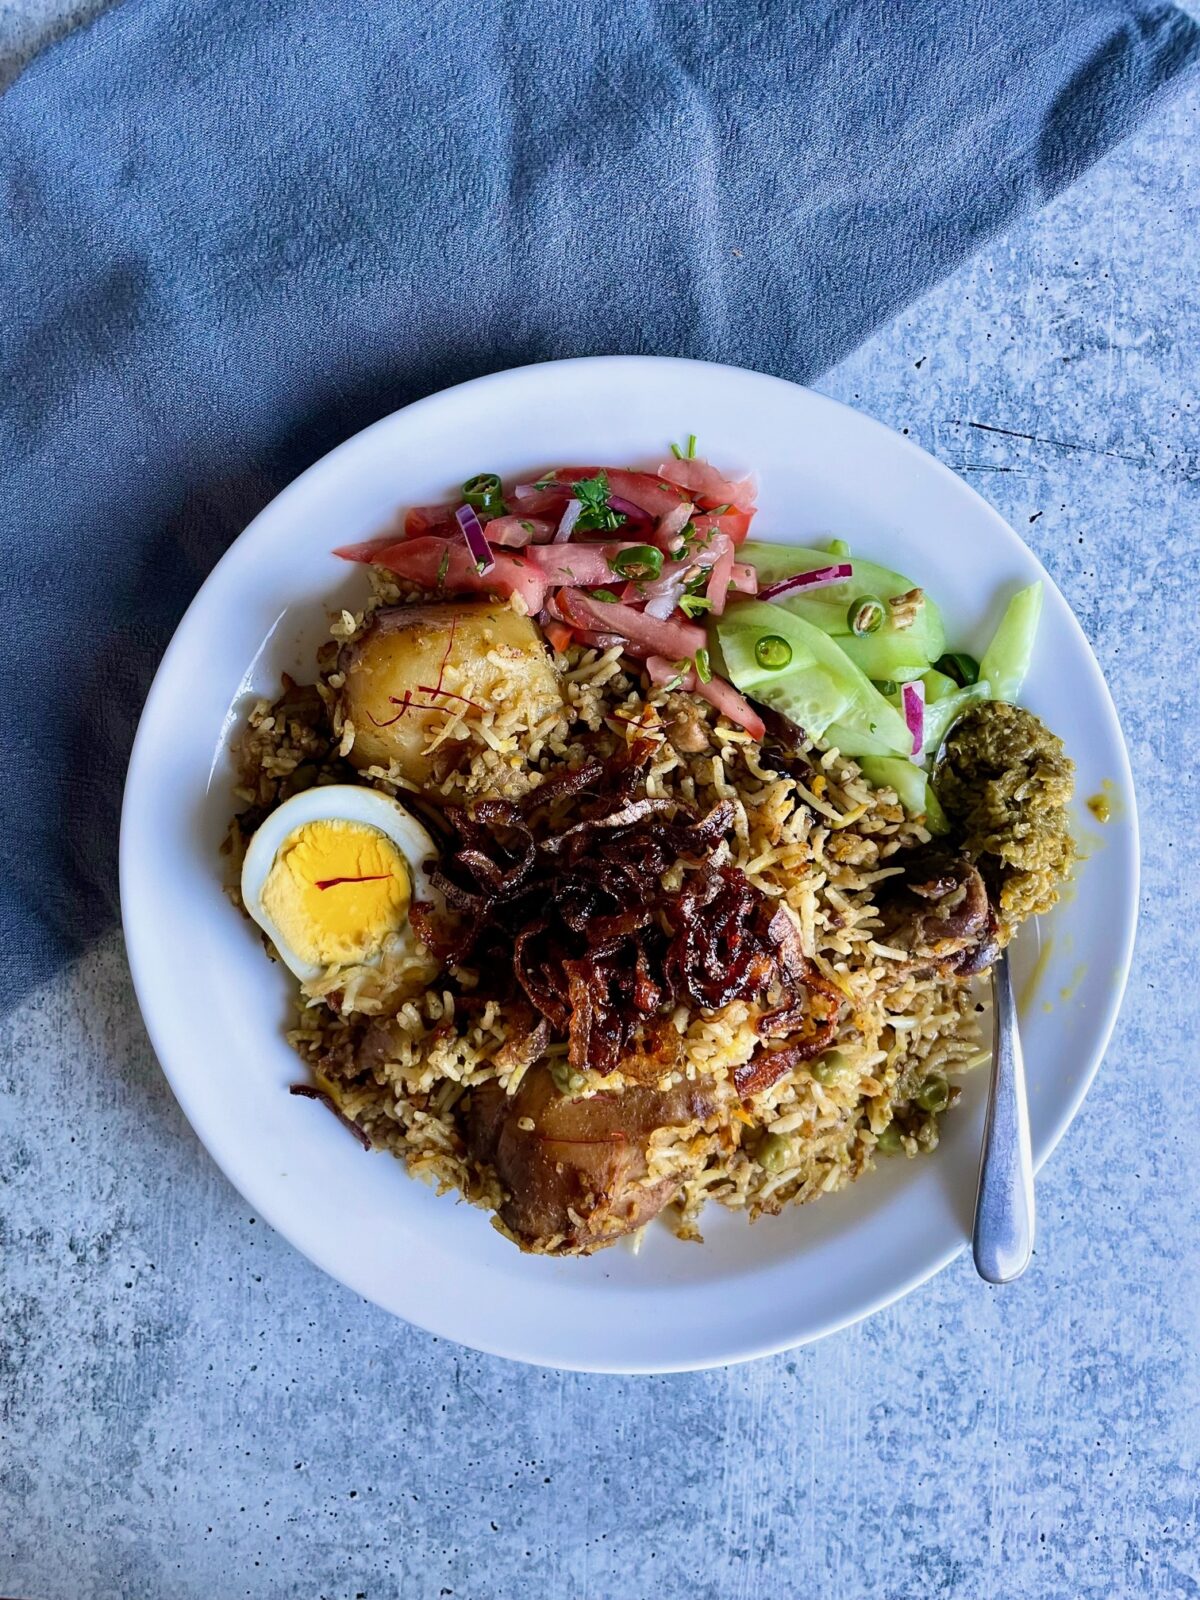
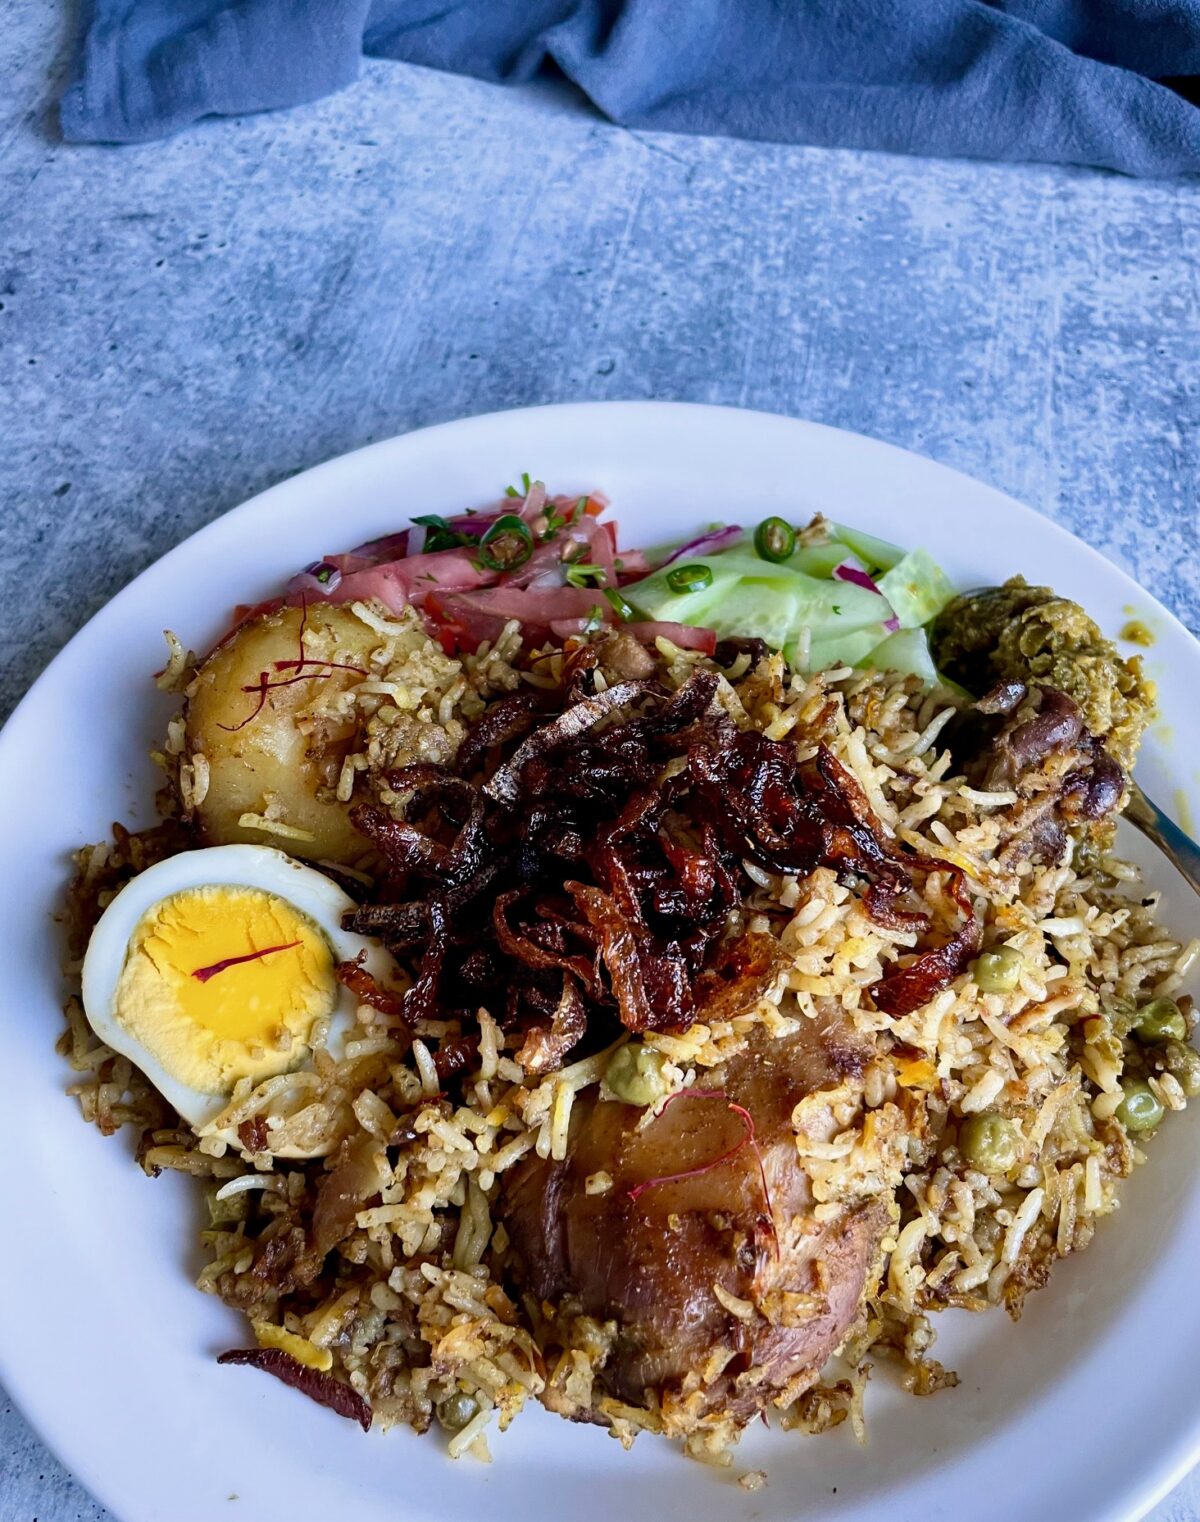
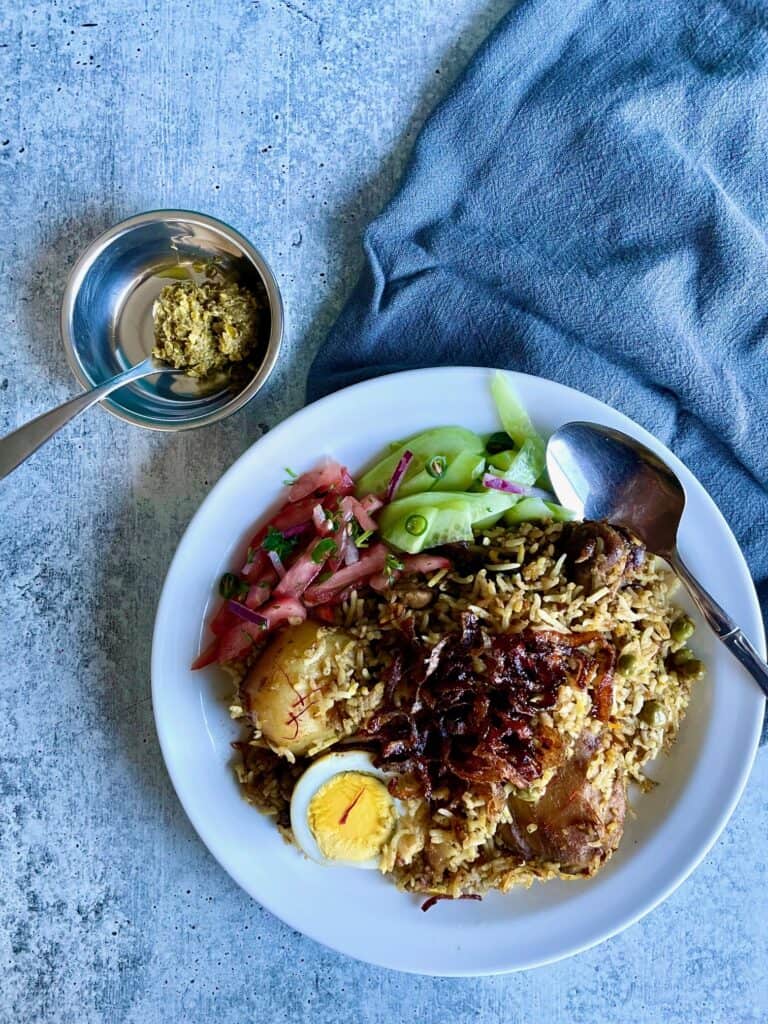
Ladies and gentlemen, I present to you our beloved Mauritian chicken biryani, made unique by the omission of raita and inclusion of chatini pomme d’amour (tomato salad/salsa), cucumber salad, and Mazavaroo green chili paste.
Jump to:
- What’s the secret to a perfect Mauritian biryani?
- Essential ingredients and pieces of equipment
- What to serve with a Mauritian biryani?
- Recipe ingredients
- How to make Mauritian chicken biryani (detailed and with pictures)?
- Storage and heating
- Frequently Asked Questions (FAQs)
- Mauritian Chicken Biryani (Briani Foolproof & Step-by-Step)

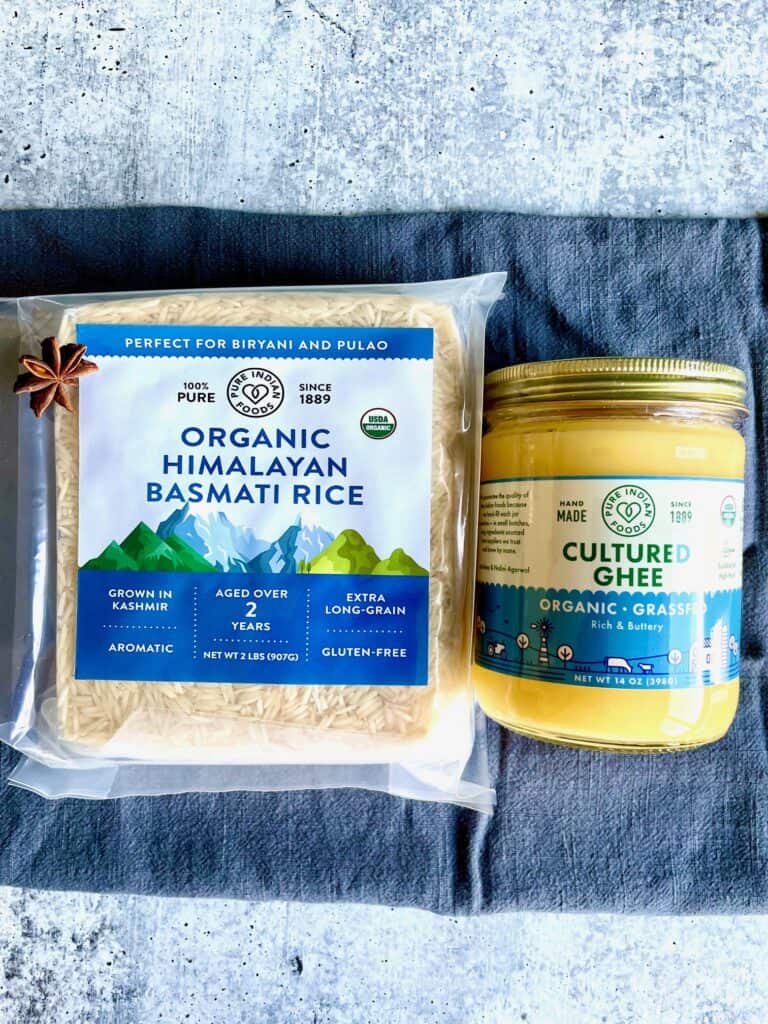
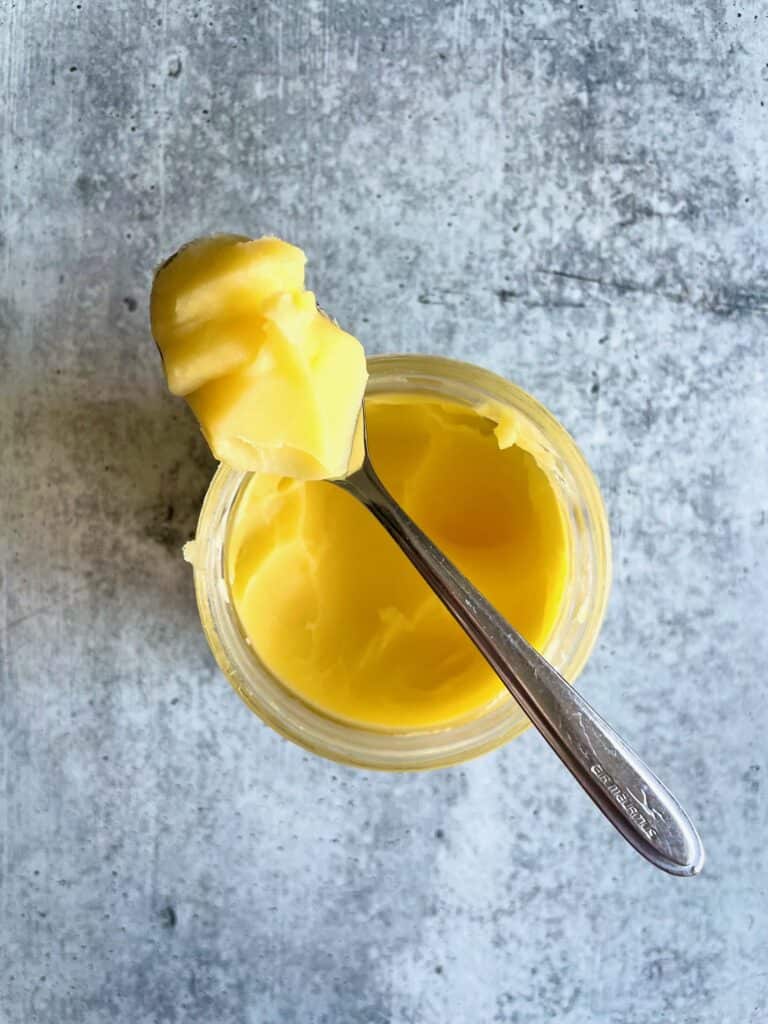
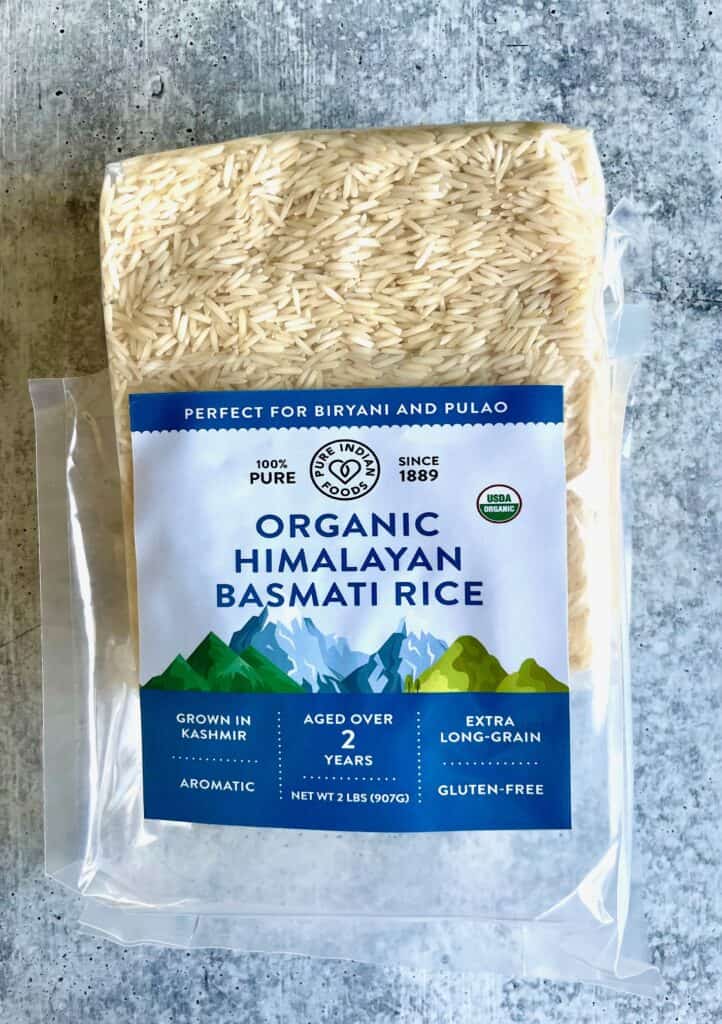
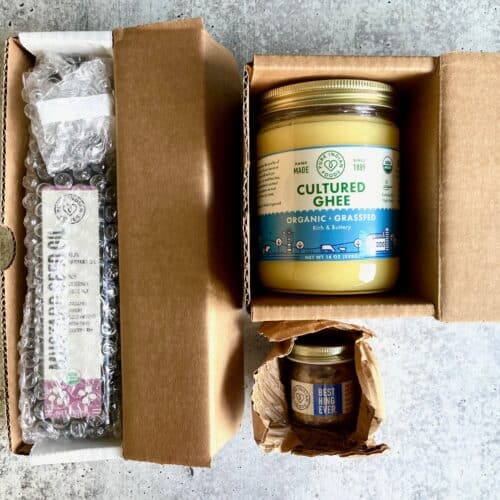
A very special thank you goes to Pure Indian Foods for supplying me with some of their exceptional products for this recipe! All opinions on products mentioned here are my own. We’re featuring their organic Himalayan basmati rice and organic grassfed cultured ghee for this Mauritian chicken biryani.
What’s the secret to a perfect Mauritian biryani?
Biryanis are infamous for being time-consuming, intimidating, and tricky to cook at home. In fact, when I first tried to make our Mauritian biryani, I almost cried because it took several hours to prepare the ingredients, another hour to cook, and the result was a bit of a mushy mess. My next attempt resulted in a biryani that was both undercooked and overcooked. Another time I burnt the bottom. I’m sure a lot of you can relate to some, if not all, of that if you’ve tried to prepare it yourself.
After multiple tries based on online and cookbook recipes for Mauritian chicken biryani, I decided I needed my very own failproof method to make one of my favorite dishes. Something that will shorten the prep and cook time and, most importantly, render a beautifully prepared biryani every single time without the tears…
Read on further to learn the secrets to a perfect Mauritian chicken biryani!
Essential ingredients and pieces of equipment
The right ingredients (crucial)
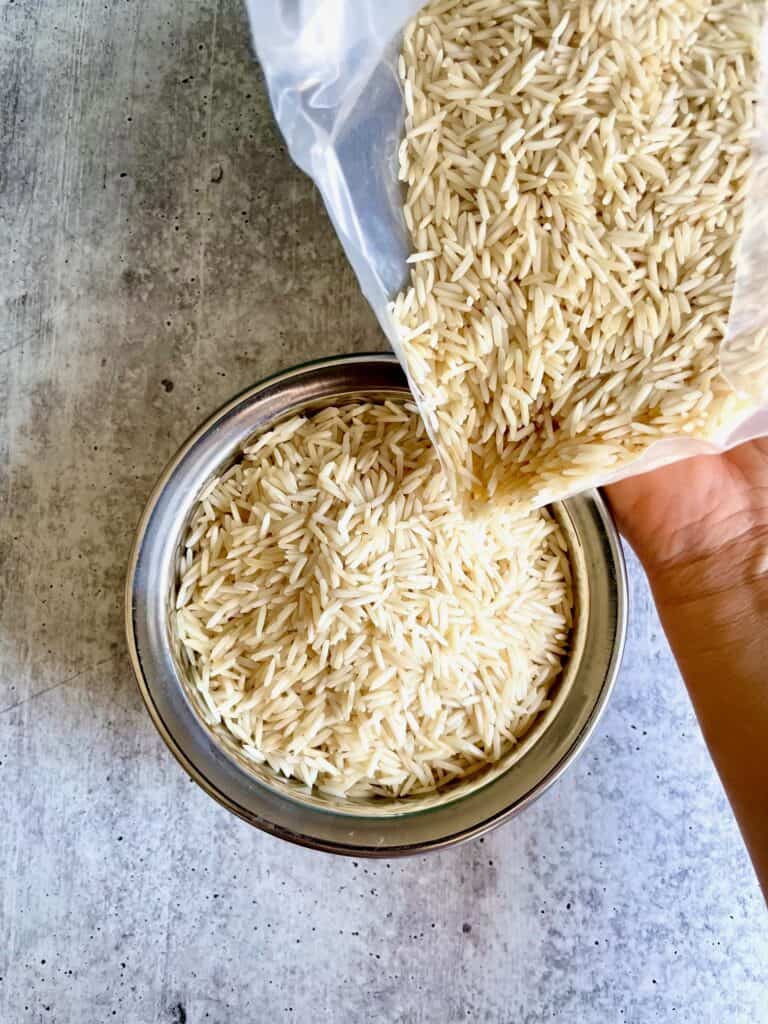
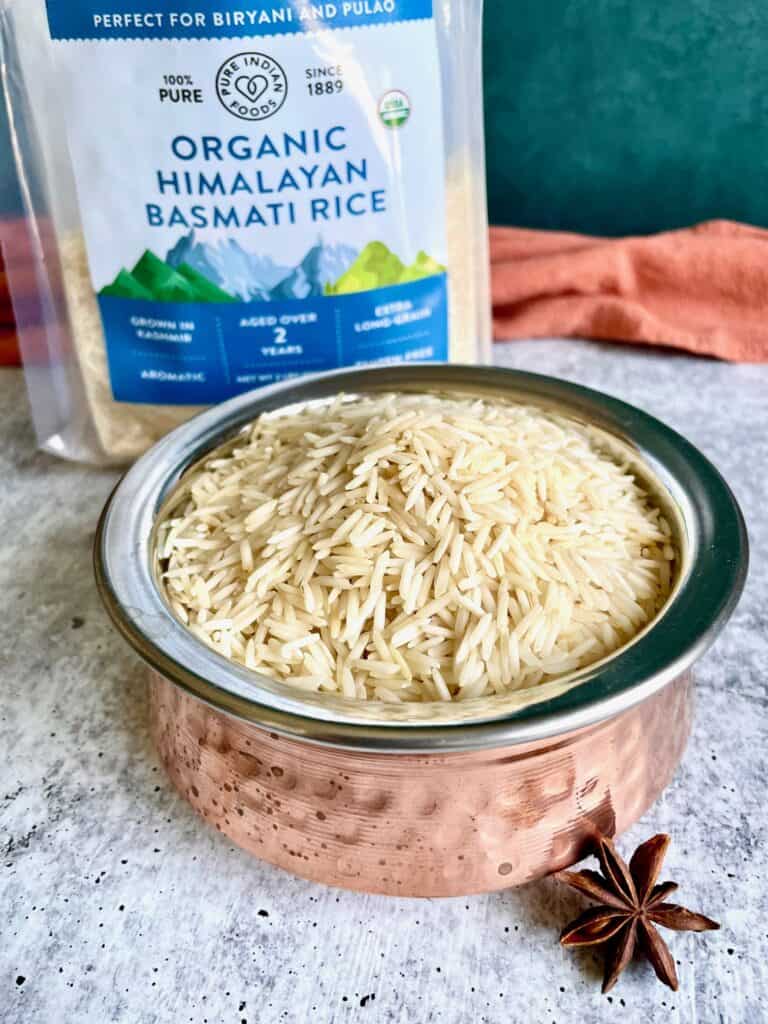
Aged basmati rice
Basmati rice is a highly fragrant long grain rice that cooks fluffier than regular white rice. It is imperative to get the right type of rice to make biryani/briani. You will need to source an aged basmati rice worthy of your efforts.
Unaged basmati rice won’t work as well because your rice will not be as fluffy as aged basmati rice. You want the grains to be beautifully separated once cooked. Rice used for biryani needs to be aged, and ideally from India. This is the single most important ingredient in a biryani.
I have tried many aged basmati rice. Some of them I purchased in Artesia, Los Angeles’s equivalent of Little India, and some on Amazon, including the popular Royal brand. They usually worked well but nothing has come close to Pure Indian Foods Himalayan aged basmati rice.
The elements that set theirs apart from regular good aged basmati rice is the fragrance and purity. Pure Indian Foods aged basmati rice is not only certified organic, it is also aged for a longer period of time, two years. This results in a more complex nutty aroma and firmer grains that do not stick together.
If you’re not in the US, try to source an equally excellent aged basmati rice. Look for one that has been aged for two years or longer and grown in the foothills of the Himalayas. If you can find one that’s organic, that’s a nice bonus.
The right pieces of equipment (crucial)
Heavy pot
As previously mentioned, we’re making this biryani without the use of a biryani deg or any other special tool or equipment. To have success replacing a traditional biryani deg, it’s vital to use a large heavy pot like All-Clad’s, or a Dutch oven like Le Creuset’s.
If you don’t, the biryani will not cook evenly and there’s a very good chance that the bottom will burn. A large heavy pot, or a Dutch oven, is the single most important piece of equipment to get the best result.
Another reason for using either of these two is that you will need a relatively heavy lid so that you can properly seal the pot or Dutch oven to steam the biryani. If you’re already feeling a bit intimidated by the process, don’t be.
Follow the basic rules in this guide and you’ll soon be rewarded with tasty biryani worthy of your time and effort!
Cast-iron tawa
If you’re thinking of making biryani, I’m going to assume that you make Indian food regularly and therefore have a tawa. If not, invest in a tawa as it’ll change your biryani game if you make it on the stove top.
This is especially important if you don’t have it in the budget to get either a heavy pot or Dutch oven. The cast iron tawa will add a layer of thickness that is essential to a perfectly made biryani.
The right preparation and cooking methods
Seal the pot tightly
There are a few methods to seal the pot. You can prepare some dough and use it to seal the lid and the pot so that no steam can escape, creating the ideal steam environment for your chicken biryani. This is the traditional method.
Although, I’m all for being traditional, I don’t personally like this method because the biryani is already time consuming to make and I don’t want that added step. Plus it creates a bit more mess to clean.
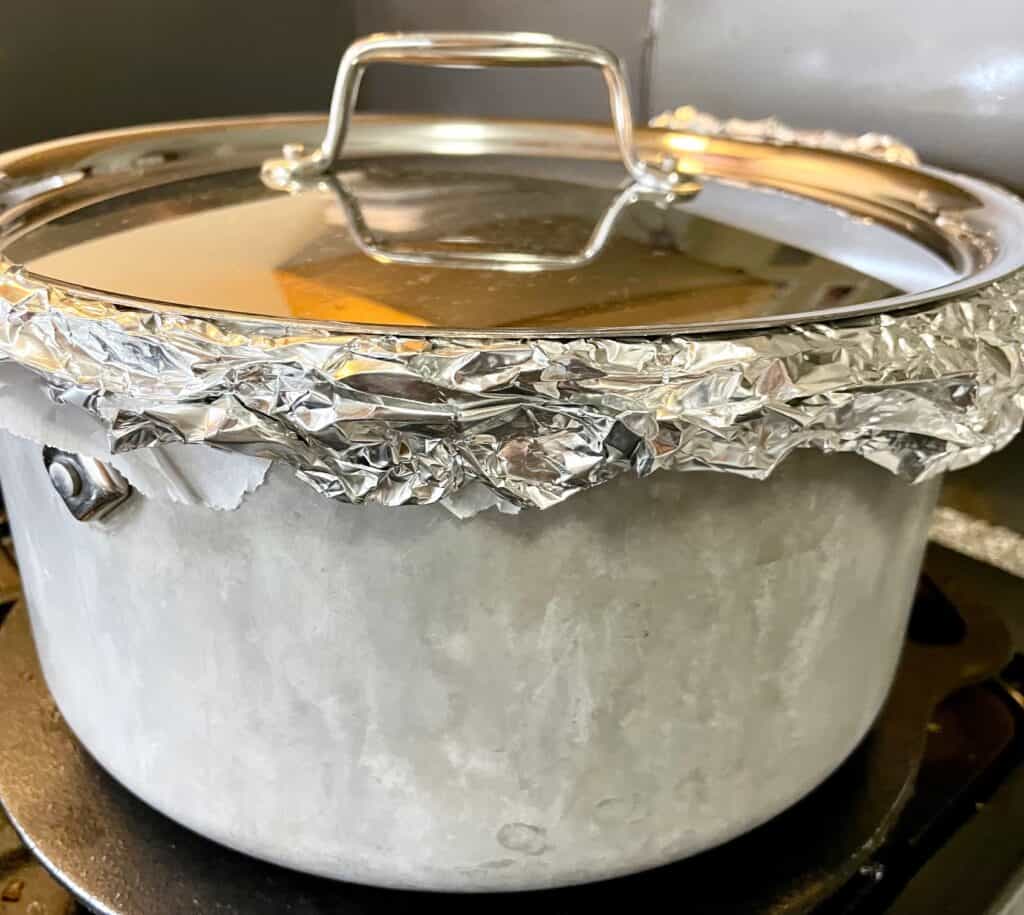
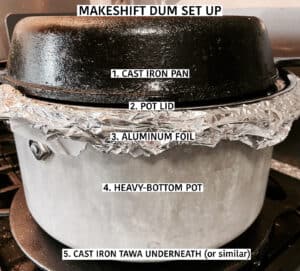
With my method, all you have to do it is cover the pot with aluminum foil, fold it tightly all around the pot, add the lid on top then put a heavy pan on top of it. In my case, I chose a cast iron pan. This set up mimics using the more traditional biryani deg set-up that’s sealed with a dough paste.
Keep scrolling for a picture of the makeshift dum setup in the step-by-step section below!
Parboil the rice
Another important step is to parboil (or par-cook) the rice. This simply means that you partially cook the rice, in this case, until it’s half-cooked then drain it. Parboiling the rice ensures that it’s already partially softened when you steam it in your pot. If you make the mistake of skipping that step, you’ll end up with unevenly cooked biryani and the rice on top will likely be undercooked.
Love and patience
Preparing biryani is a labor of love and when it’s properly made, your family will taste that love in your cooking. You’ll also need some patience, with yourself and perhaps even with me.
I did my best to write, test, and re-test this recipe several times to make it as foolproof as possible. But I’m not there with you in your kitchen to see how you’re going about it. Therefore, I cannot rectify any issues as they arise. We all use different brands and types of equipment and do not possess the same experience in the kitchen.
For this reason you’ll need to be patient, as making biryani is a time consuming dish with a lot of steps where things can go wrong. What I can promise you is the more you make this recipe, the better you’ll become at it.
This biryani guide is written in a way that will minimize the pain points (issues) and simplify an otherwise tricky dish, so that your first biryani is a real success. Enjoy, and please ask me questions in the comments section below and I’ll do my best to help out and troubleshoot anything!
What to serve with a Mauritian biryani?
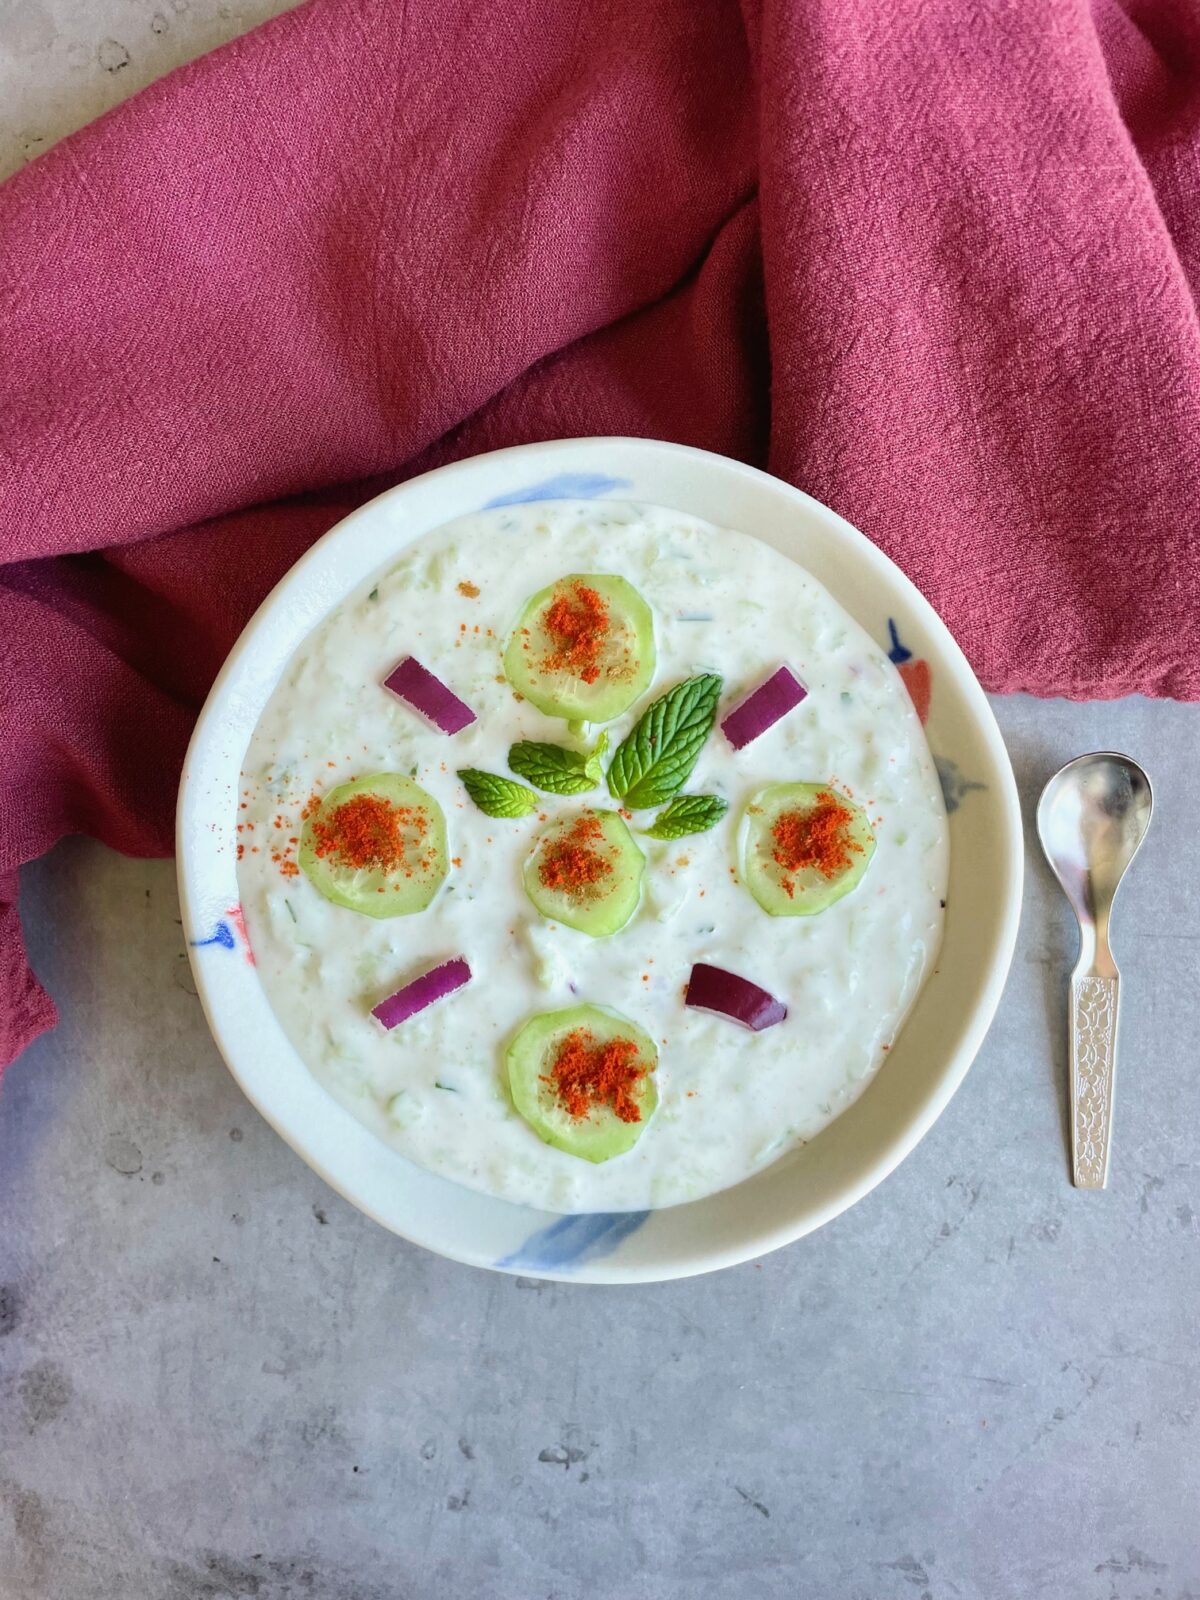
There are so many different types of condiments and side dishes you could serve with a biryani around the world. Common examples are cucumber raita (a yogurt-based condiment), mint chutney, pickled onions. However, on the tropical island of Mauritius, we like our accompaniments and condiments light and refreshing.
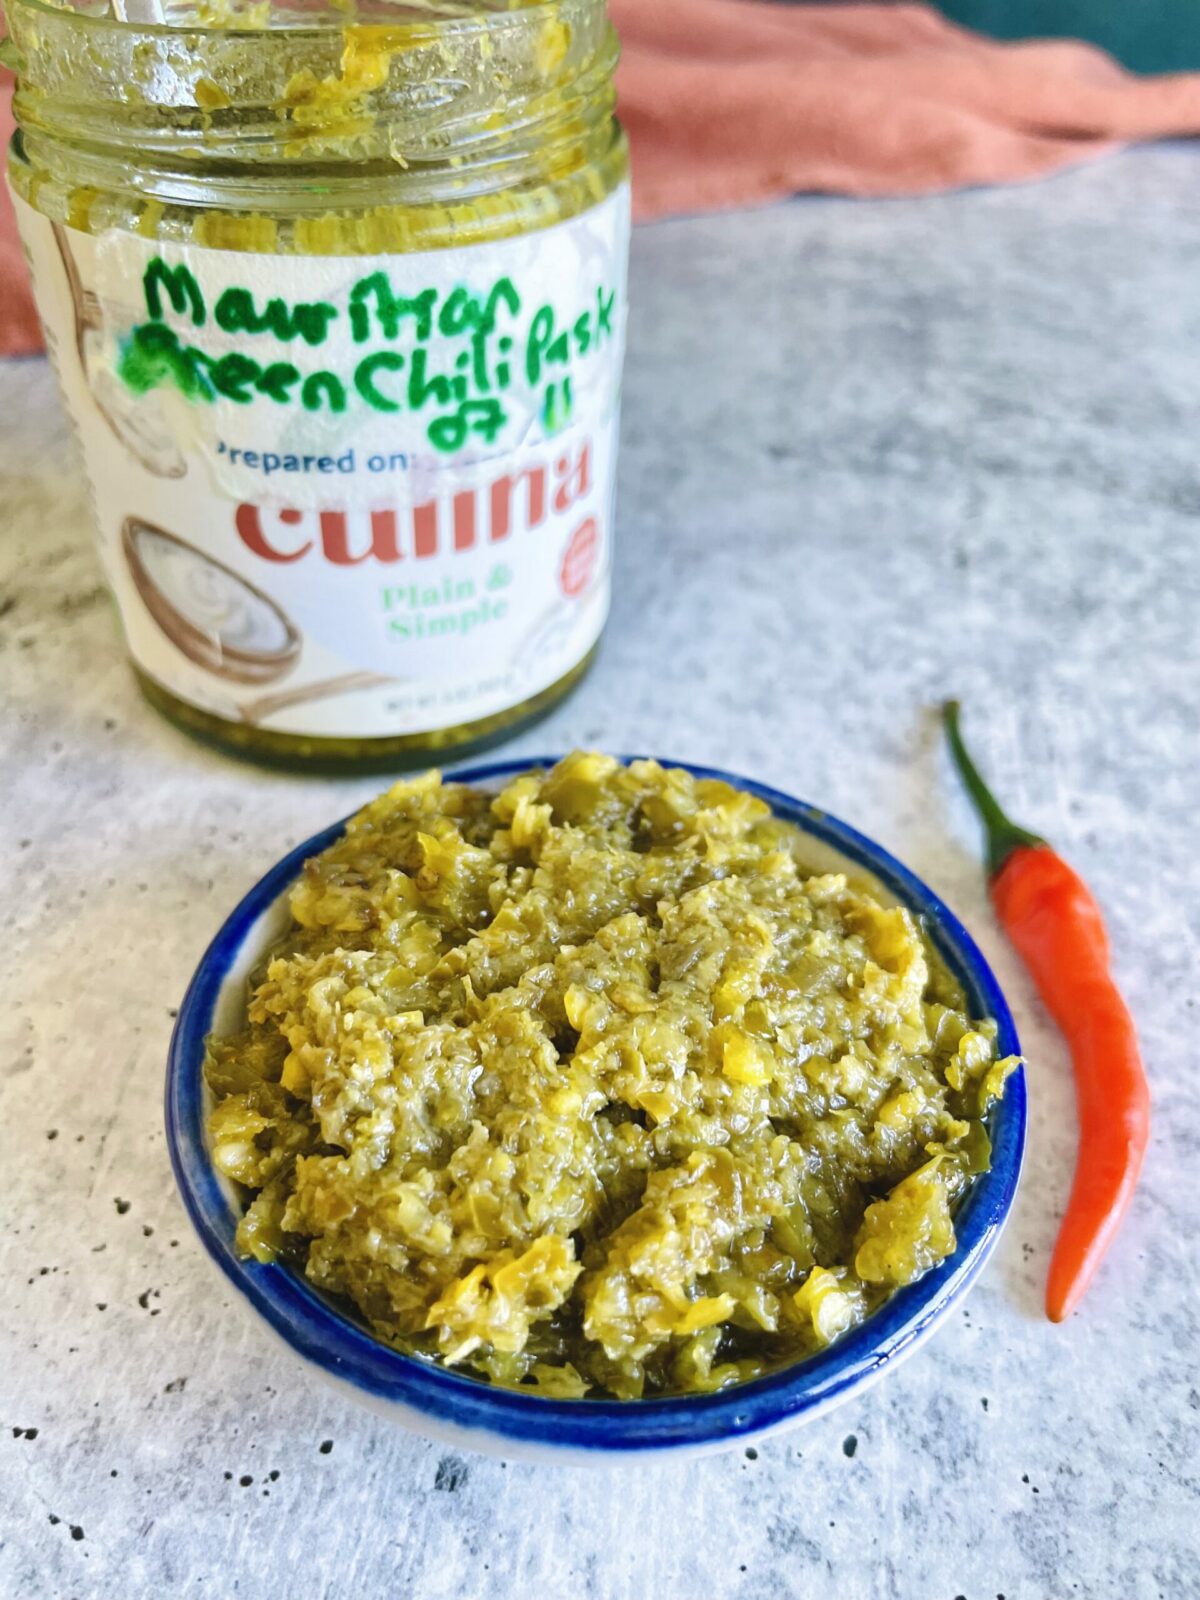
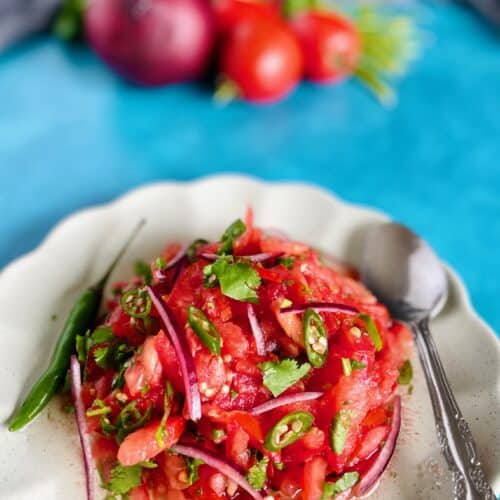
So, instead of the more traditional raita, we prefer to serve our chicken bryani, and all of our Mauritian biryanis for that matter, with a chatini pomme d’amour (tomato salad/salsa), a vinegar-based cucumber salad, along with the quintessential Mazavaroo green chili paste.
A fresh bowl of raita still graces the Mauritian table sometimes but not always! Here are the recipes for my chatini pomme d’amour, Mazavaroo chili paste and cucumber Raita.

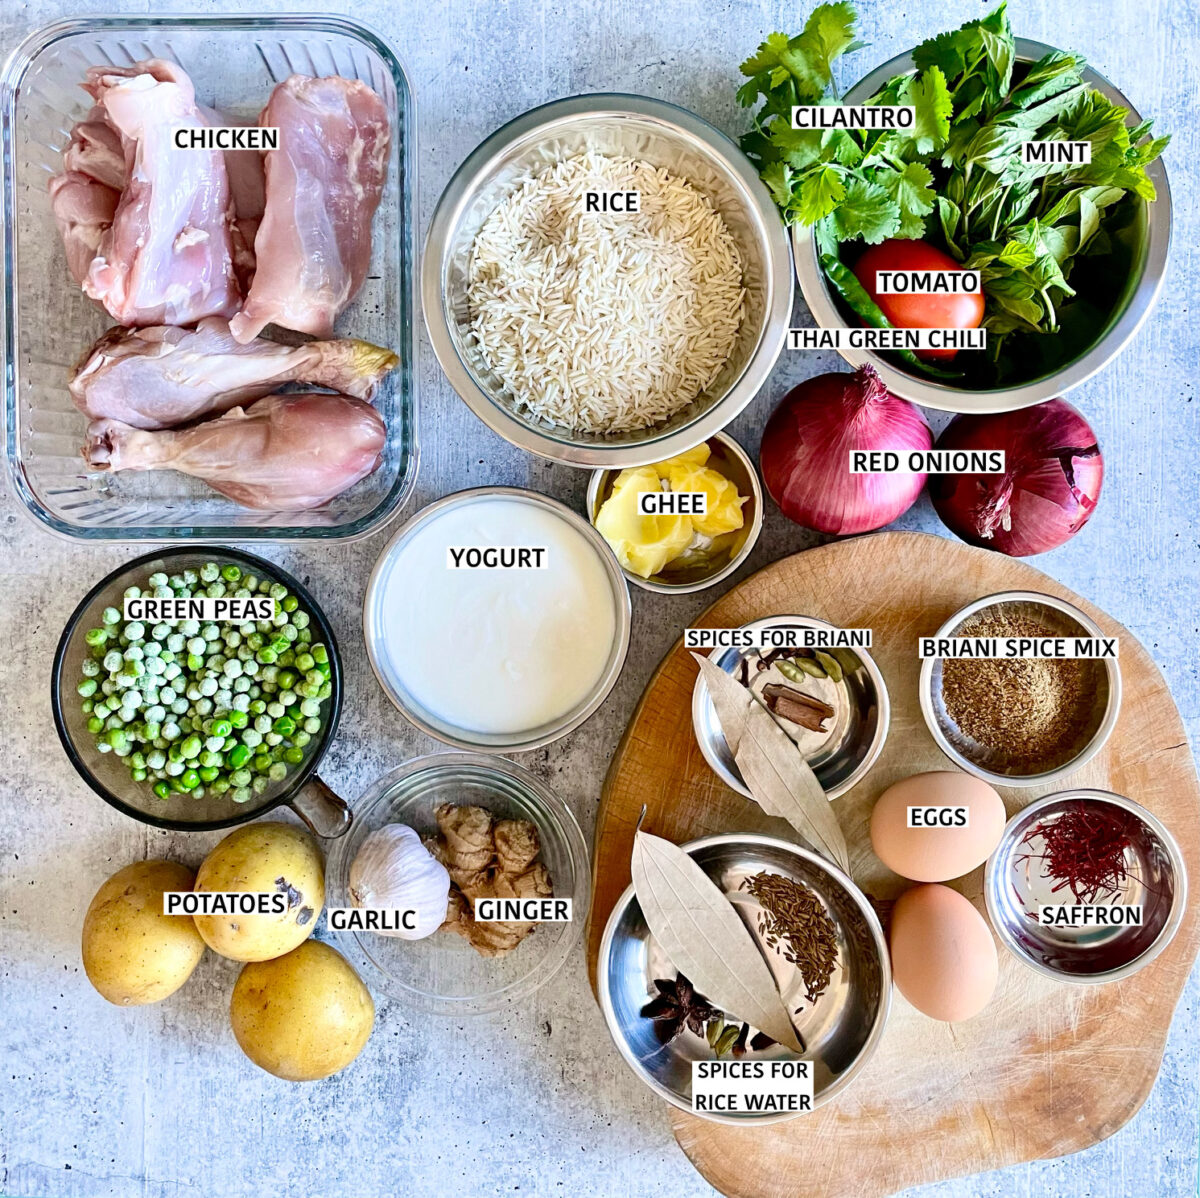
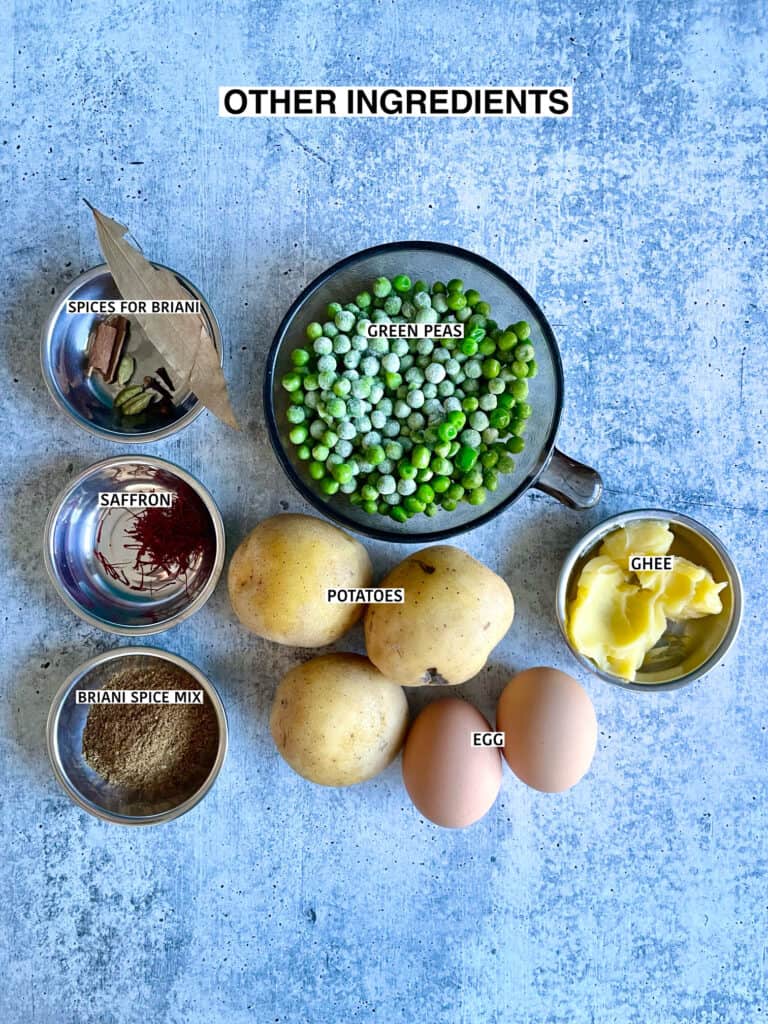
Recipe ingredients
You’ll need the following ingredients to make this Mauritian chicken biryani, or briani poulet:
How to make Mauritian chicken biryani (detailed and with pictures)?
Let’s break down how to make a perfect biryani, shall we?
Step 1. Source all your ingredients
Yes, this goes without saying but I can’t tell you how many times I have started cooking to then realize that I was missing an ingredient or two. So it’s important to make sure you have all you need and in the quantity necessary.
Step 2. Mise en place
Don’t be tempted to skip the mise en place as taking the time for it will save you time and frustration in the end. Get all your ingredients together and gather them in sets. See below.

Step 3. Preparing Ingredients
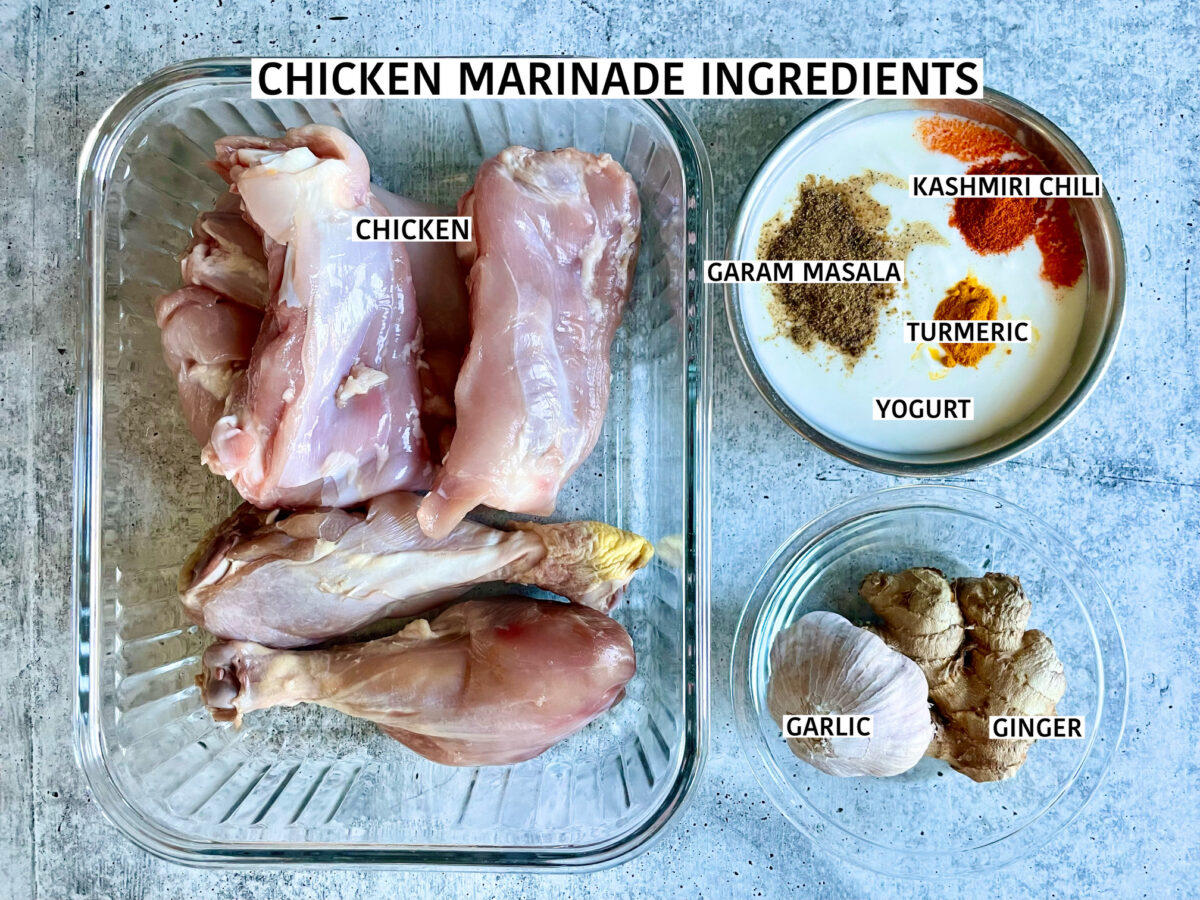
Chicken marination
It’s important not to skip the chicken marination step, as the marination process will reward you with tenderized and perfectly cooked chicken.
Mix all the chicken marinade ingredients in a bowl: yogurt, garam masala, turmeric, Kashmiri chili, grated ginger, grated garlic, and salt. Then add the chicken, mix well, and make sure the pieces are well coated. I like to sprinkle some more Kashmiri chili on top but this is optional.
Marinate in the fridge for at least 2 hours. Letting it marinate overnight for the most succulent-tasting chicken is worth it, but 2 hours is fine if you’re short on time. Let the marinated chicken come to room temp about 1 hour before cooking.

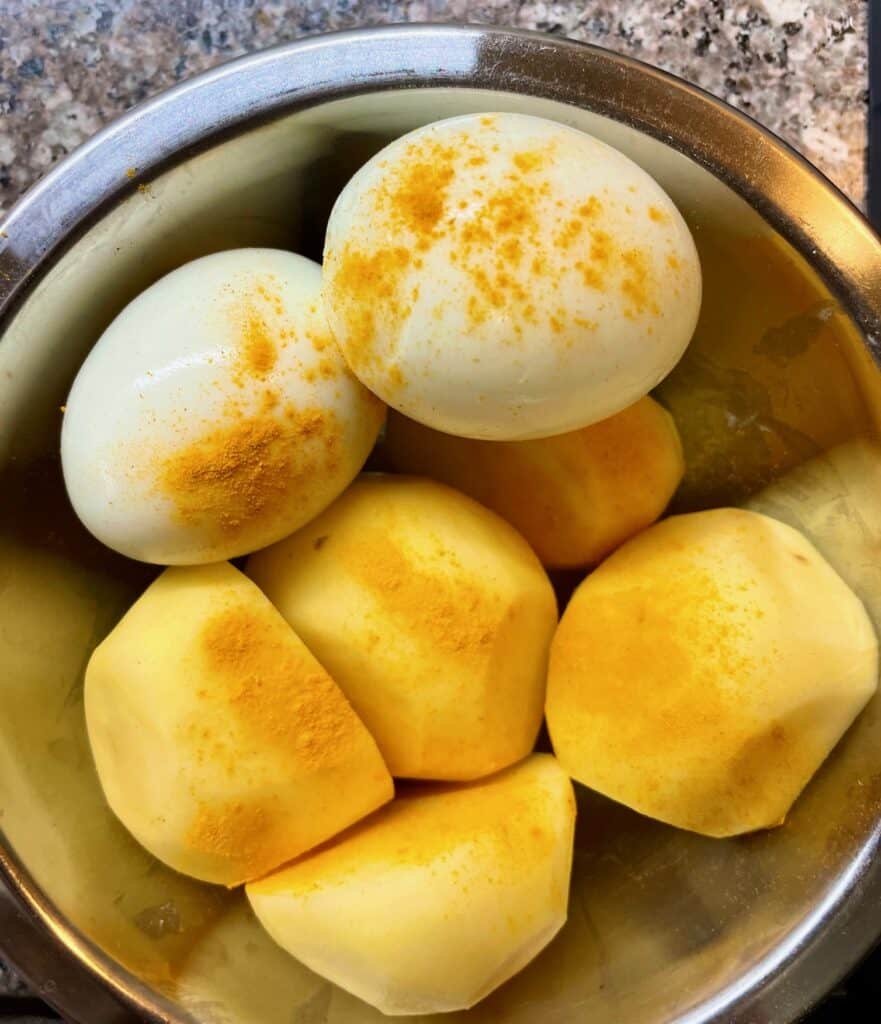
Step 4. Egg and potatoes
Steam or boil the eggs, peel, then set aside. If you need help with this step, there are more detailed instructions in the printable recipe card below.
Peel the potatoes and cut them in half. If you have a very large potato, you can cut them into thirds. You want the size of the potatoes to be a bit bigger than the eggs. Sprinkle a pinch of salt and some turmeric on your hard boiled eggs and potatoes.
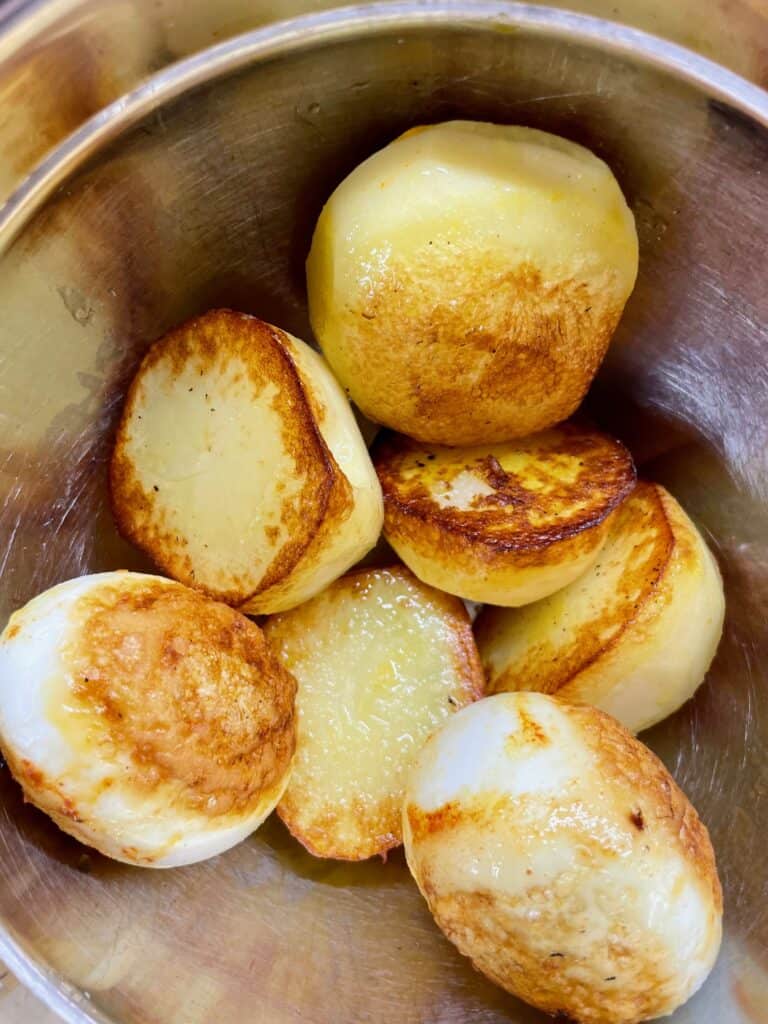
Next, heat ½ cup of vegetable oil ,on medium to high heat, in a large saucepan. Once the oil is hot, carefully add the potatoes and the hard boiled eggs. Fry 3 minutes on each side. Set the egg and fried potatoes aside.
Step 5. Fry red onion and saffron water
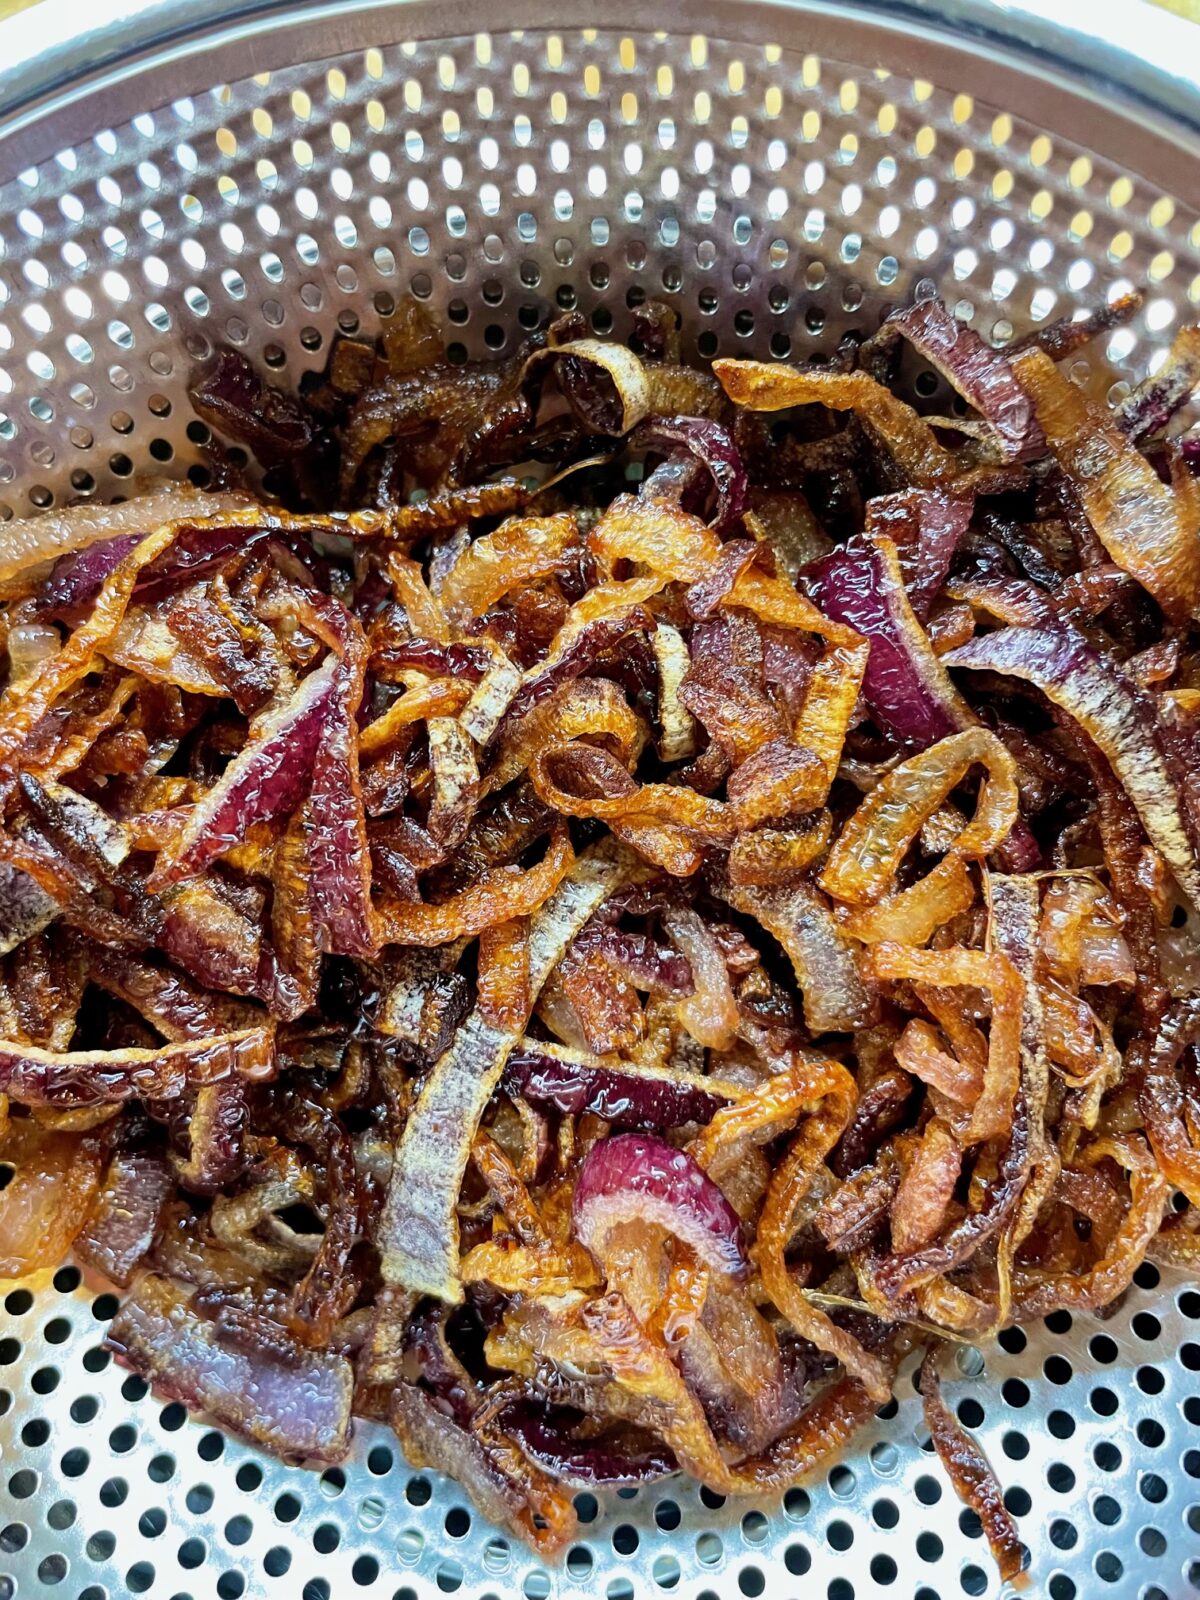
Thinly slice the large red onion and fry in a large pan on medium heat. You’ll need about half a cup of vegetable oil, enough to cover the onion halfway. Fry until golden brown.
Make sure to stir every few minutes, taking care not to burn the onion, especially towards the end when it’s almost ready, this is when it can easily burn if neglected. Once ready, leave the fried onion to drain in a colander or strainer, and set aside.
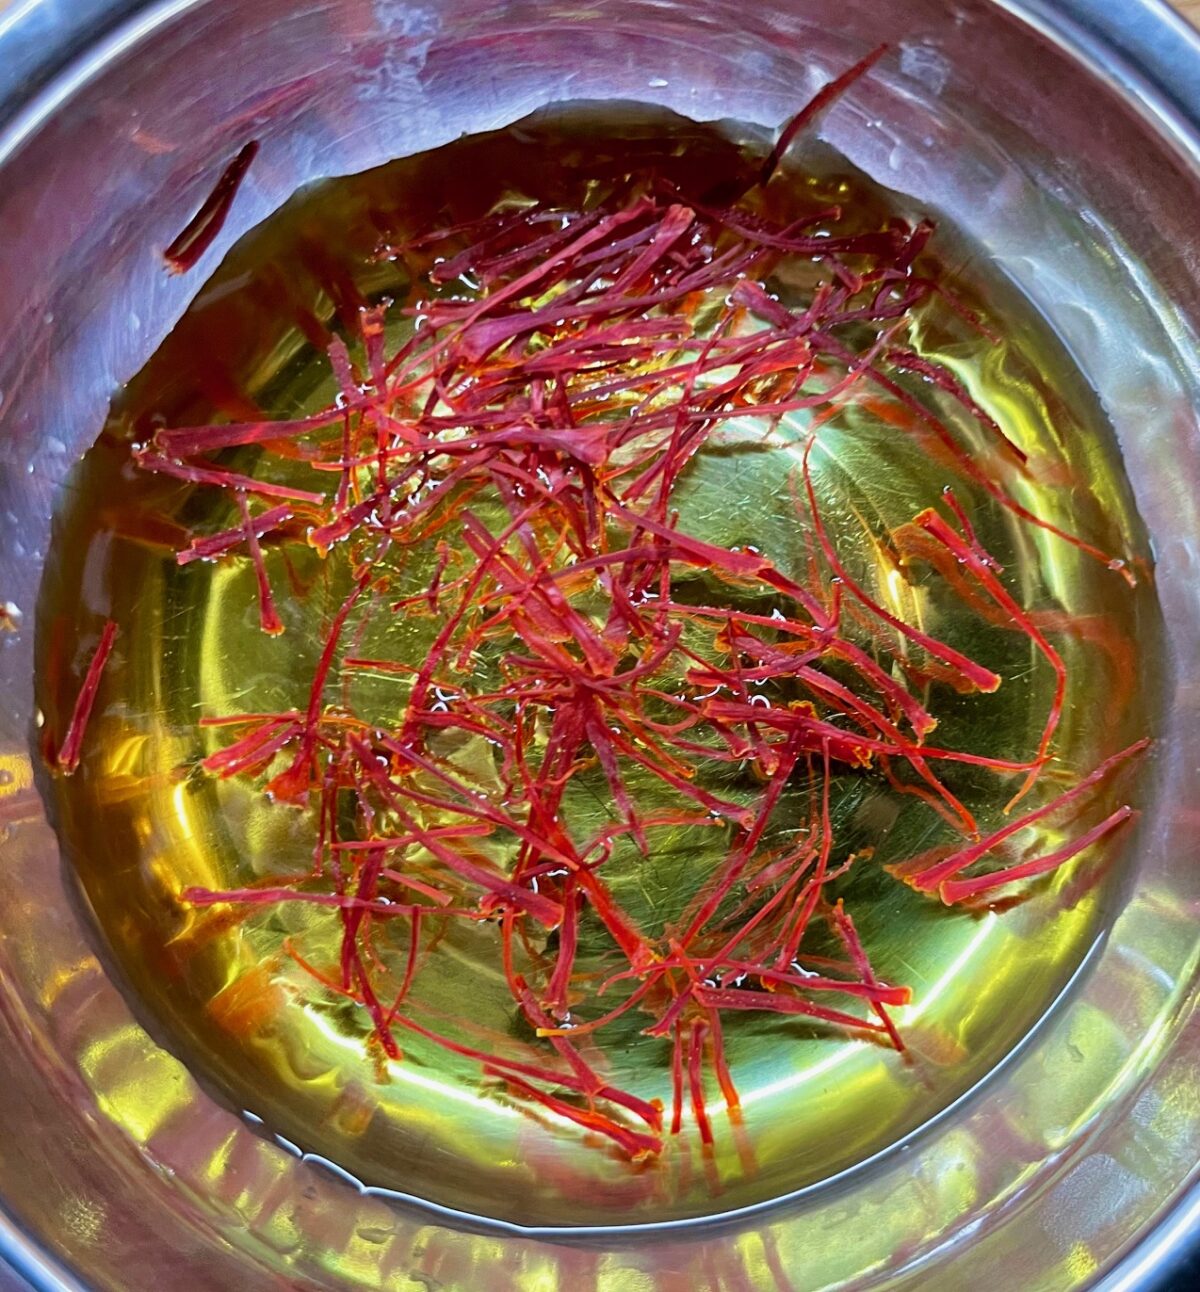
Mix the saffron with 1/4 cup of water (or milk, your choice), then set aside. Also if you haven’t removed your marinated chicken from the fridge already, remove it now.
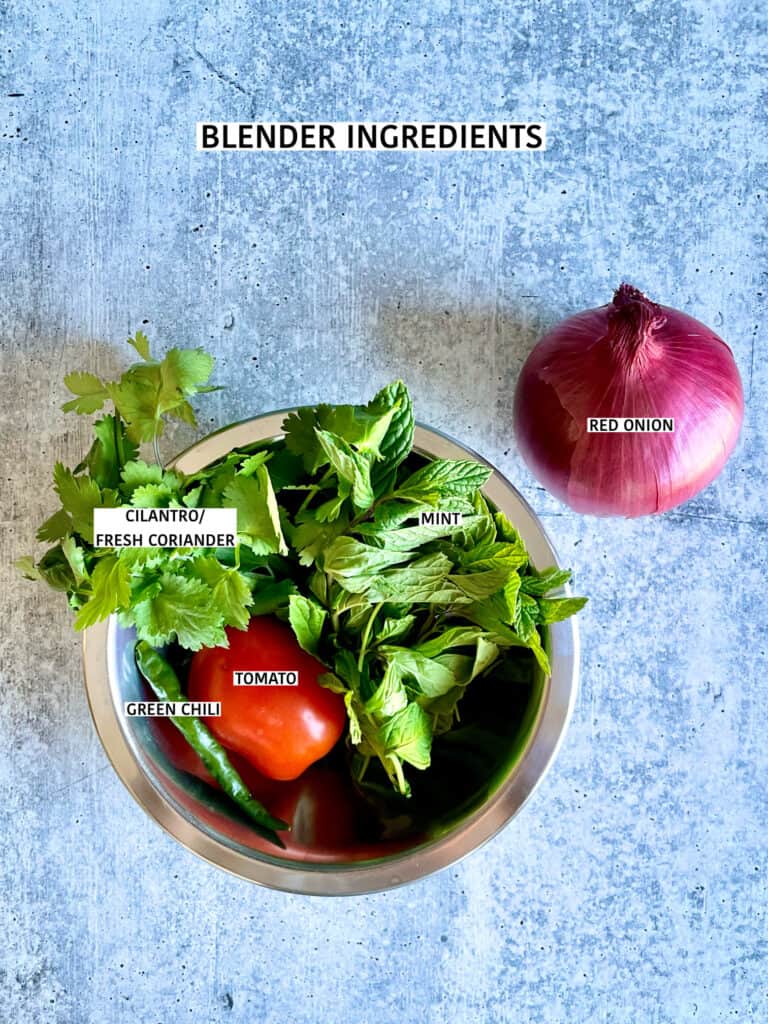
Step 6. Blend ingredients
While waiting for the red onion to fry, roughly chop the small red onion (about 1/2 cup chopped), along with the tomato, cilantro/coriander leaves, mint, and green chili. Add all to blender and top it with enough water for blending (about half a cup or 8 ounces). Blend until smooth and set this blender mixture aside.

Step 7. Parboil the rice
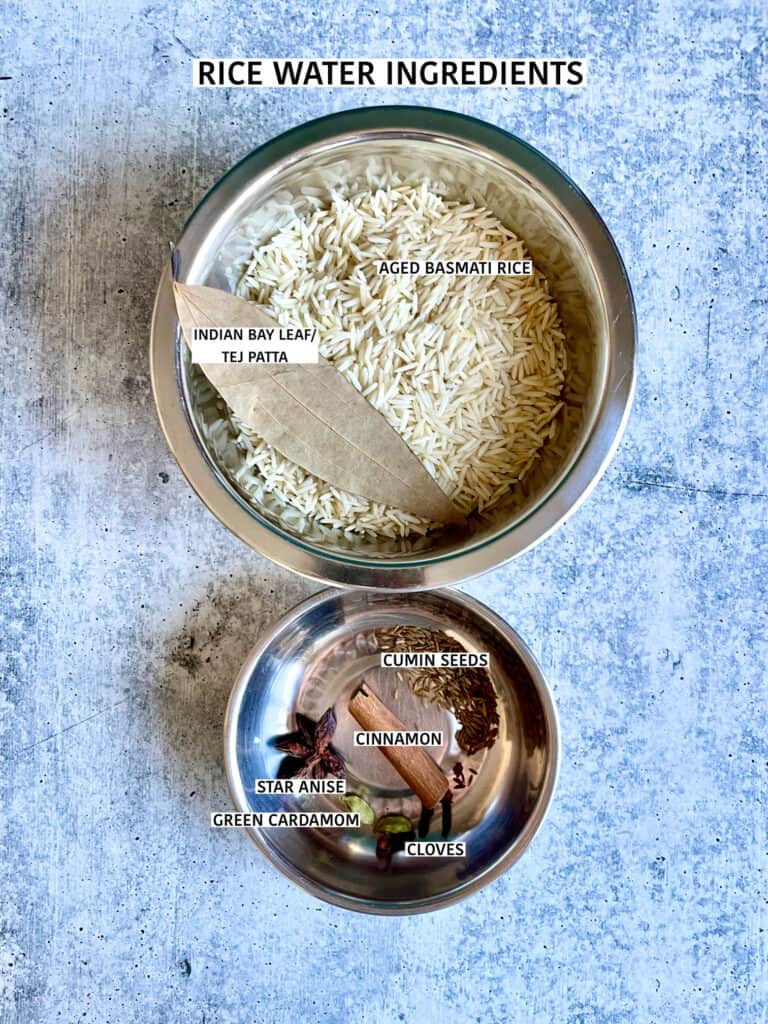
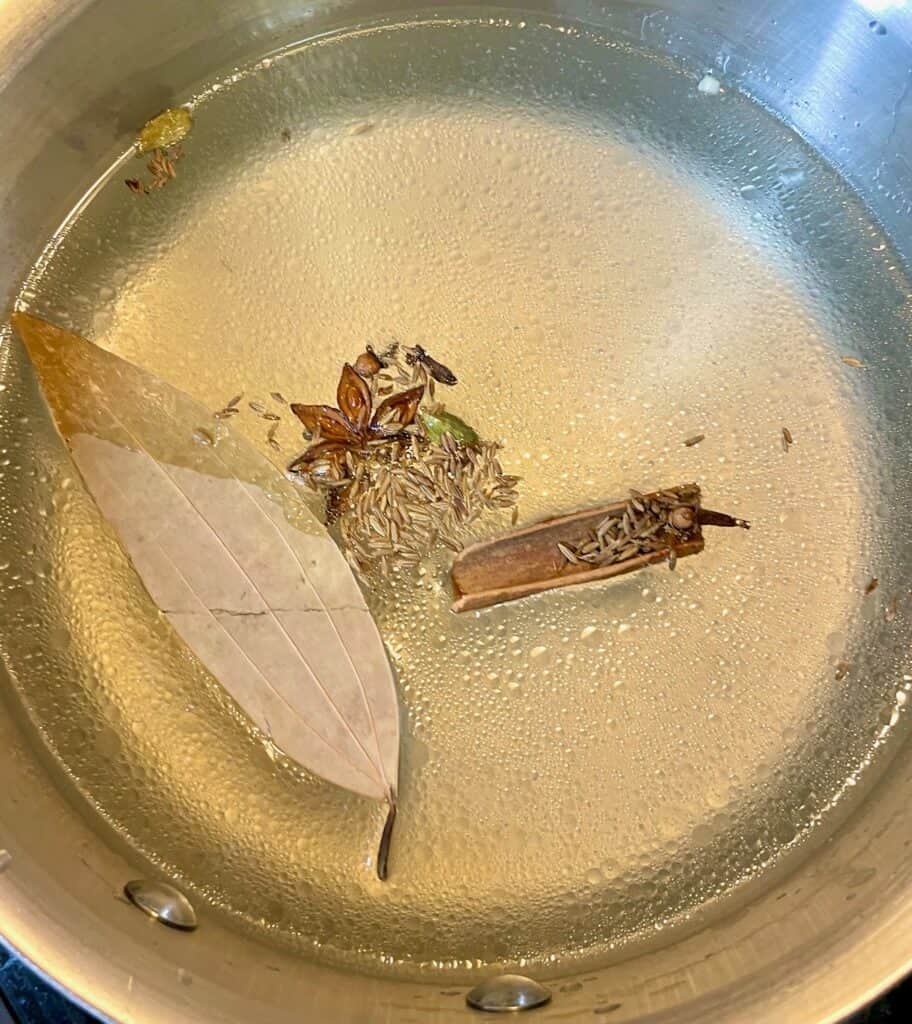
Rinse the rice several times until the water runs clear. Soak the rice for a half hour. In the meantime, boil the spiced water for the rice by heating 7 to 8 cups of water mixed with the spices for the rice water: Indian bay leaf, cinnamon stick, cumin seeds, cloves, green cardamom pods, and star anise (optional).
In that, mix add 1 teaspoon salt and a quarter teaspoon of vegetable oil. Taste your rice. It needs to be slightly salty, like the ocean. If it doesn’t add another half a teaspoon of salt.
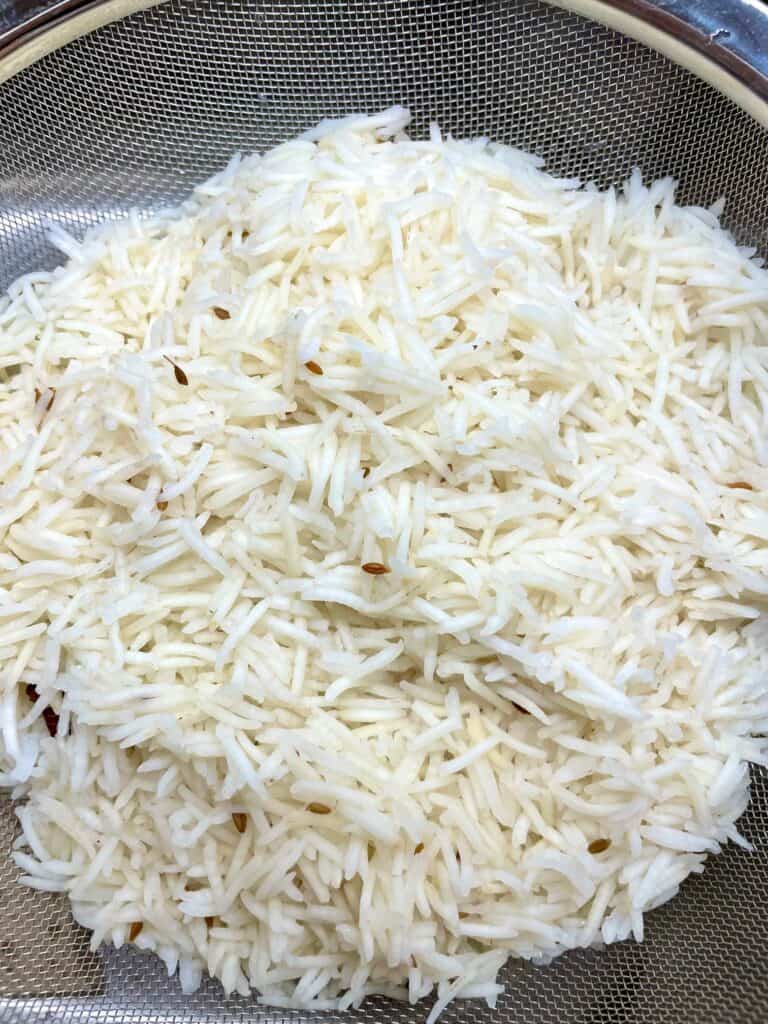
Boil water rapidly for 5 minutes to release the beautiful aroma of the spices. Add the drained rice and cook until it’s 50% cooked. The core of the rice needs to be uncooked. This step takes about 3-4 minutes. Overcooking the rice will result in a mushy biryani, so pay close attention.
Refer to the picture below to see how the parboiled rice should look. Drain the parboiled rice in a colander and set aside (leave it in the colander so it continues to drain). Discard the whole spices, except for the cumin seeds.
Step 8. Layer the biryani ingredients in the pot
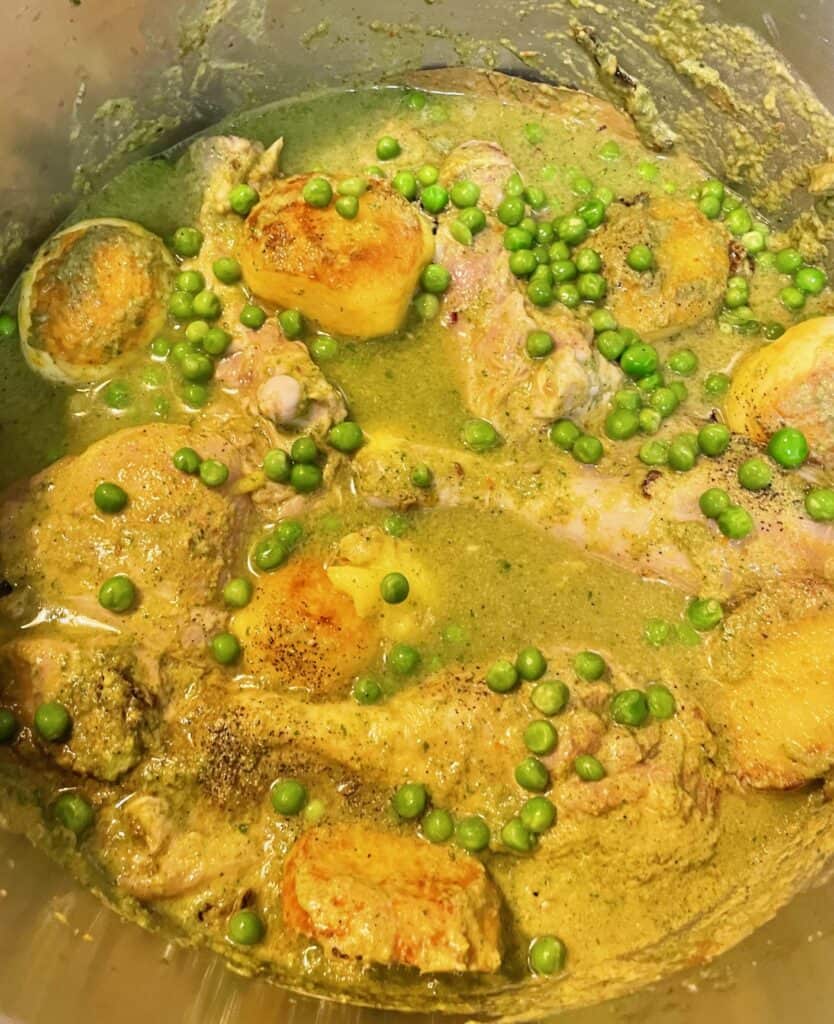
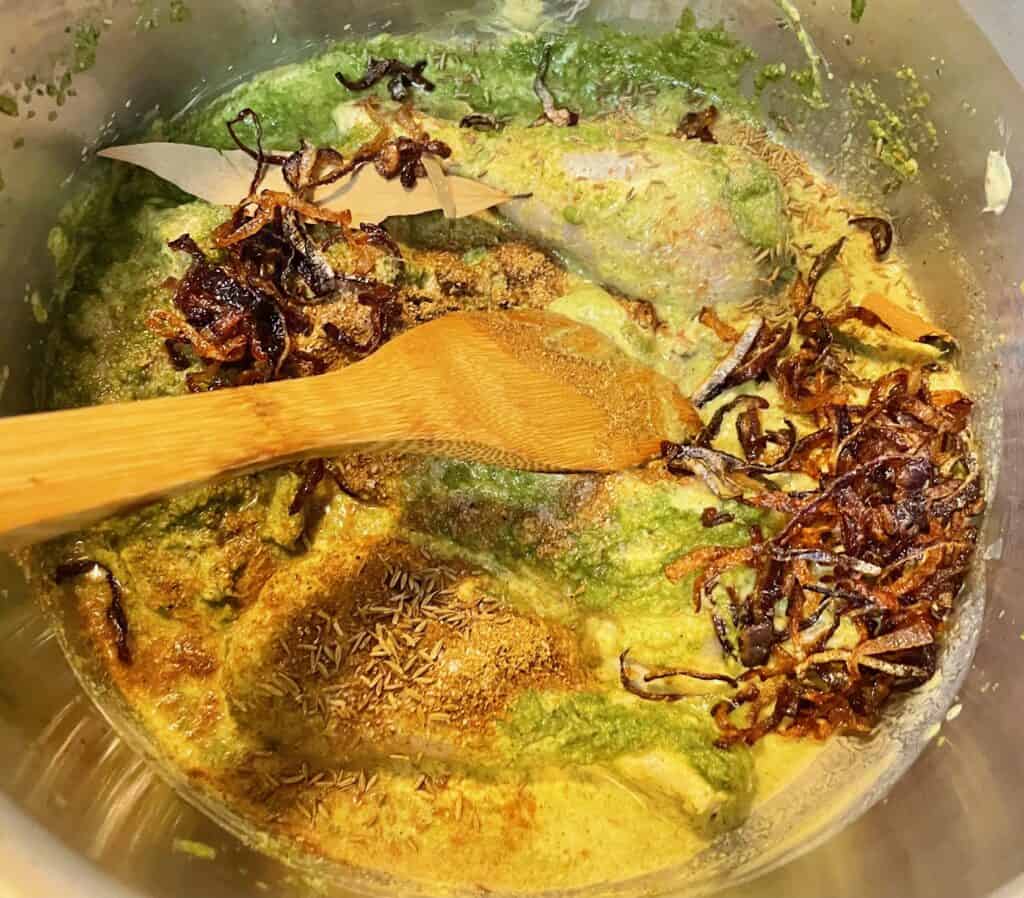
Bottom layer (1st layer). At the bottom of a large heavy pot, add the chicken with its marinade and the blender mixture. Mix well. Next, add the fried eggs and fried half-cooked potatoes along with half of the peas and handful of the fried red onion (about half of it). Mix well.
Add half of the ghee and all of the biryani spice mix. I don’t usually toast the biryani spice mix but you can and that extra step will add a bit more nuance to your dish.
Now add enough water to cook the biryani but not so much that your biryani becomes mushy. The trick is to add enough water to cover the chicken and potatoes, but you can still see them. So don’t cover them completely. Start with half a cup and work your way up. Refer to the pictures below. Mix everything really well again.
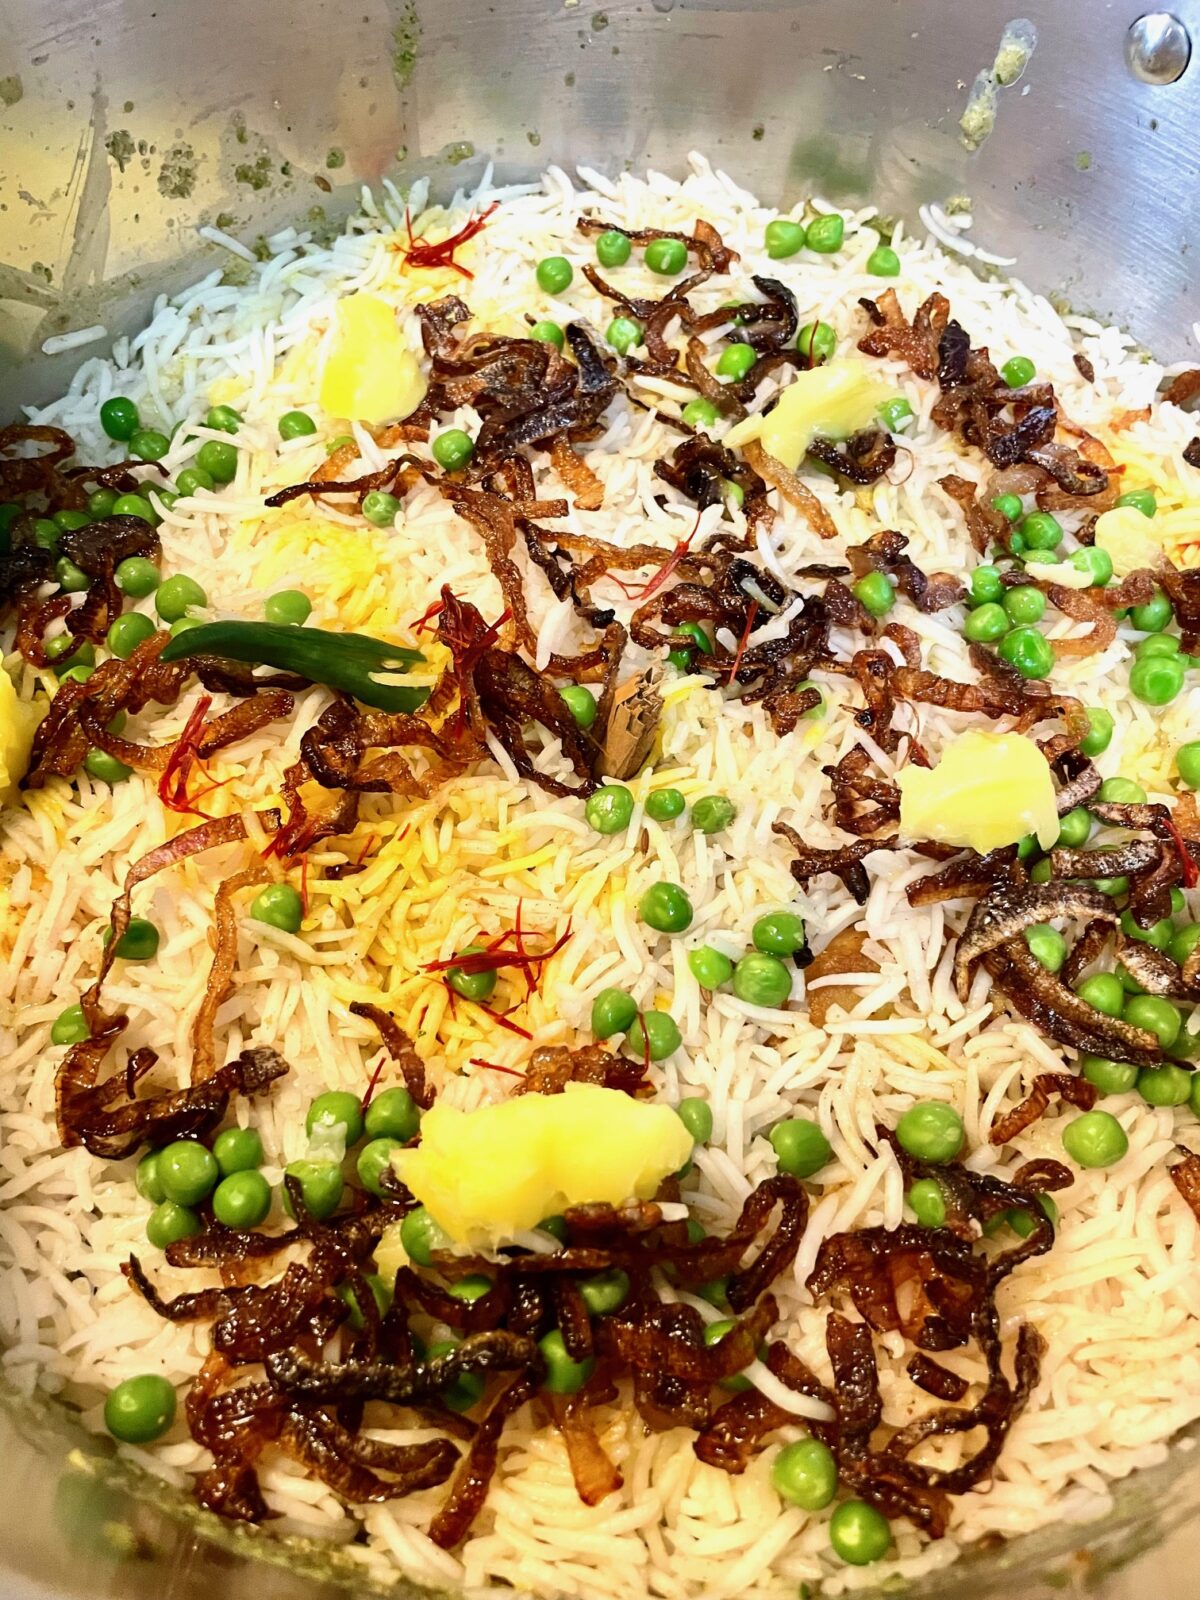
Middle layer (2nd layer). Add drained rice along with the spices for biryani, namely: 1 Indian bay leaf, 1 cinnamon stick, 3 green cardamom pods, cumin seeds, cloves, and 1 star anise (optional). Flatten the top of the rice with the back of a spoon.
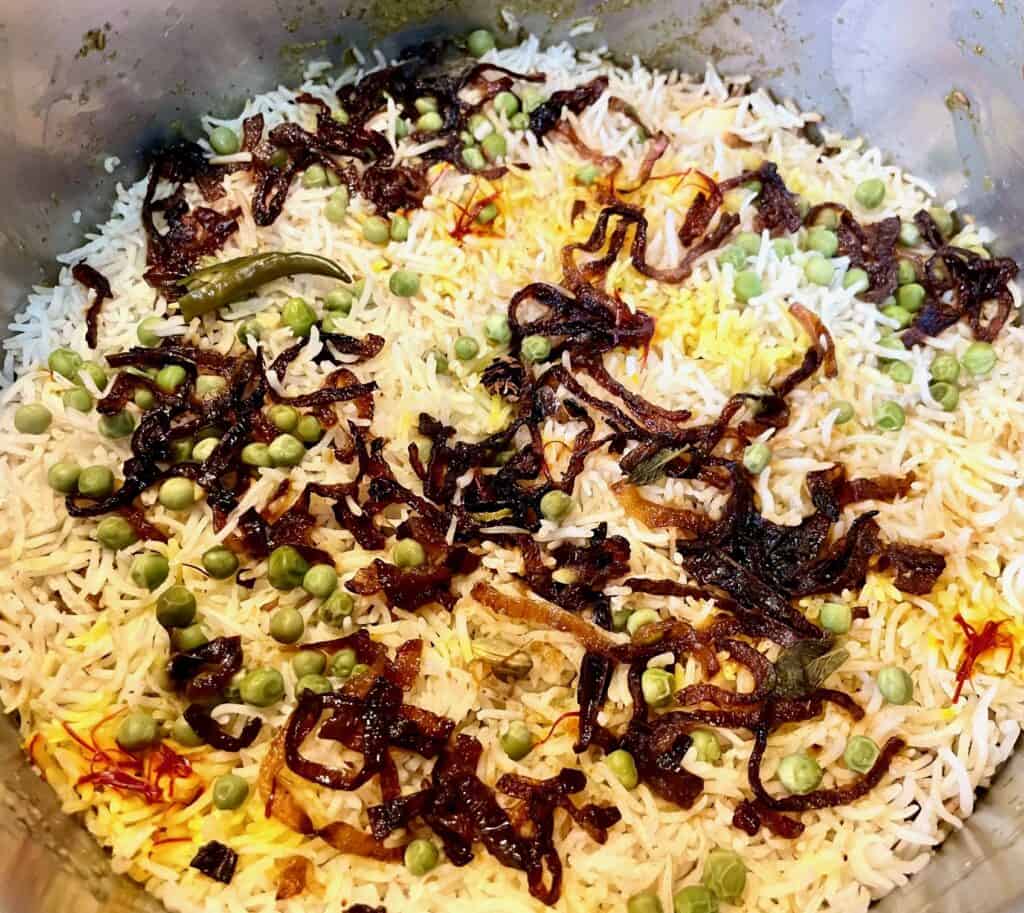
Top layer (3rd layer). Sprinkle the remaining peas and fried red onion on top of the rice. Then add the remaining ghee, a small dollop here and there (as in the picture below). Pour the saffron water all over the top. I like to add an additional slit green chili, but this is optional.
Step 9. Cook the biryani
Once the biryani is layered. Set up the cast iron tawa, heavy bottom pot, aluminum foil, lid, and cast iron pan as shown below. Make sure to seal the aluminum foil really well. If you don’t have a cast iron pan, put any heavy pan on top. This whole set up ensures that the steam doesn’t escape, which is important to properly steam the biryani on the stove top.

Set the heat to medium high. Ideally, the flame should reach all over the bottom (or diameter) of the pot. Cook for exactly 20 minutes. Set a timer!
When your timer goes off, reduce the flame to the lowest. Cook for exactly 15 minutes. Set a timer again!
Once your timer goes off, turn off the flame and let your biryani rest for 20 to 30 minutes untouched. Don’t be tempted to peek at this point because the biryani needs the trapped steam to finish cooking.
Step 10. Garnish and enjoy
After 20 to 30 minutes, it is now time to uncover your beautiful work. The top of your biryani should look like the first picture below. Mix all the layers and serve with satini pomme d’amour and cucumber salad. I also find Mazavaroo green chili paste to be indispensable but if you’re not into spicy, you can omit.
Storage and heating
Let the Mauritian chicken biryani cool down completely so it does not trap moisture. Transfer them into individual containers. It keeps for 4-5 days in the fridge, and tastes even better the next day!
It’s best to make fresh chatini pomme d’amour, cucumber salad or raita (if using), the day you enjoy them because they don’t keep well.
Frequently Asked Questions (FAQs)
I cannot stress the importance of using a heavy pot or Dutch oven enough. A cast iron or thick tawa to put underneath the pot is also very helpful to cook your chicken biryani evenly and prevent burning. Other than that, no special equipment is needed.
It is pretty mild the way it is but if you’re very sensitive to spicy food, you can omit the green chilies in the recipe.
Yes, you can freeze the Mauritian chicken biryani. The potato might be a little mealy after it’s defrosted but the rest will re-heat nicely. You can add a small amount of ghee when you heat the biryani after defrosting.
Finally, garnish it with some cilantro/coriander leaves. These will make the dish taste as good as fresh.
Mauritian Chicken Biryani (Briani Foolproof & Step-by-Step)
Equipment
- 1 large heavy pot or Dutch oven Cast-iron or Le Creuset or good options
- 1 Cast iron tawa
Ingredients
Chicken Marinade
- 1½ pound chicken thighs and drumsticks skin removed, I used 2 thighs and 2 drumsticks
- ½ cup full-fat plain yogurt 8 ounces
- 1 tablespoon ginger grated
- 1 tablespoon garlic grated
- 1 teaspoon garam masala
- ½ teaspoon turmeric saffran (not to be confused with saffron)
- ½ teaspoon Kashmiri chili powder or any chili powder (pima)
- ½ teaspoon salt
Biryani Spice Mix
- 1 tablespoon coriander powder coriande
- 2 teaspoon cumin powder ti l'ani (tilani)
- ½ teaspoon cinnamon powder canelle
- ½ teaspoon clove girofle
- ¼ teaspoon cardamom powder elaîti
- pinch star anise optional
- pinch nutmeg optional (miscad)
Ingredients for boiling rice
- 2 cups aged basmati rice
- 1 Indian bay leaf tej patta
- 2 green cardamom pods elaîti
- 3 whole cloves girofle
- 1 inch cinnamon stick canelle
- 1 teaspoon cumin seeds ti l'ani (tilani)
- 1 star anise optional
- ¼ teaspoon vegetable oil
- 1 teaspoon salt
Blender ingredients
- 1 tomato Roma or plum preferred
- ⅓ cup cilantro coriander leaves
- ½ cup mint leaves la menthe
- 1 green chili Thai or bird's eye
- 1 small red onion chopped, about 1/2 cup
- ¼-½ cup water
Other ingredients
- 2 large eggs
- 2 yellow potatoes or red potatoes
- 1 medium red onion sliced thinly, for frying
- 2 inch cinnamon stick canelle
- 4 cloves girofle
- 1 Indian bay leaf
- 3 green cardamom pods elaîti
- 1 teaspoon saffron strands jafran
- 2-3 tablespoons ghee mantègue
- 1 cup vegetable oil you might need more, divided
- 2-3 teaspoons salt divided
Instructions
Mise en place
- With biryani more than any other dish, it's very important to have your mise en place ready as you might miss an ingredient, or a step. On top of that, a mise en place will just help the whole process flow easily. Get your chicken marinade ingredients together, then your biryani spice mix, ingredients for boiling rice, blender ingredients, and finally other ingredients. Now that you have everything ready, let's do this!
Chicken marinade
- In a bowl, combine all the ingredients for the chicken marinade, except for the chicken pieces: full-fat plain yogurt, grated ginger, grated garlic, garam masala, turmeric, Kashmiri chili powder, and salt. Whisk everything until well combined.
- Add chicken and ensure that all the pieces are well coated with the marinade. Let marinate in the fridge for at least 2 hours. Letting it marinate overnight for the most succulent-tasting chicken is worth it, but 2 hours is fine if you're short on time.
- Remove the marinated chicken from the fridge and let come to room temperature about 1 hour before cooking.
Aromatic Biryani Spices (Briani Spice Mix)
- Combine your biryani spices in a small bowl: coriander powder, cumin powder, cinnamon powder, cloves, cardamom powder, a pinch of star anise powder, and a pinch of nutmeg. You can toast the biryani spice powder mix on low heat if you'd like. This step will add a little more depth of flavor. Set aside.
Cook eggs and potatoes
- Gently place the eggs into a small saucepan and fill the pan with enough water to cover the eggs. Turn the heat to medium-high and cook at this temperature for 10 minutes. After 10 minutes, reduce the heat to low, and let the eggs gently simmer for another 10 minutes.
- In the meantime, prepare a bowl of cold water with ice cubes, about 3-4 cups and 1 cup of ice. If you'd like, you can skip this step, but the ice water bath helps peel the eggs effortlessly and halts the cooking process.
- After a total of 20 minutes, drain the hot water and put the hard boiled eggs in the ice water bath. Peel the eggs, sprinkle some turmeric on top, and set aside.
- For the potatoes, cut them in half. They should be slightly bigger in size than the eggs. Sprinkle a pinch of salt and some turmeric on top, and set aside.
- Heat ½ cup of vegetable oil in a large saucepan. Once the oil is hot, carefully add the potatoes and the hard boiled eggs. Fry 3 minutes on each side. Set the egg and fried potatoes aside.
Fry the red onion
- If you haven't done so already, peel and thinly slice your large red onion.
- Heat the same large saucepan used for the egg and potatoes on medium heat. You can use the leftover vegetable oil (from frying the eggs and potatoes) and add some more vegetable oil to the pan, about ¼ cup to ½ cup more, enough to cover the onion half of the way.
- Add your sliced red onion and fry until it turns golden brown. Stir every few minutes, taking care not to burn the onion, especially towards the end when it's almost ready. This is when it can easily burn if neglected, then you'll have no choice but to start over. This whole process takes about 15-20 minutes.
- When the fried onion is almost golden, sprinkle a teensy pinch of salt all over. Once golden, transfer it to a colander or strainer and set aside to drain further.
Saffron water
- Mix saffron strands with ¼ cup water (or milk) and set your saffron water aside.
Blend ingredients
- Add blender ingredients into a blender: Roma tomato, cilantro, mint, green chili, ½ cup roughly chopped red onion, and ¼ cup water. Blend until smooth. You may need to add 1-2 tablespoons more water. The end result should be closer to pasty in texture than watery but a little watery is fine. Set your blender mixture aside.
Parboiling the rice
- Rinse the basmati rice several times until the water runs clear. Soak the rice for a half hour. Drain and set aside.
- In the meantime, boil the water for the rice. In a medium pot, heat 7 to 8 cups of water mixed with the whole spices for the rice water: Indian bay leaf, cinnamon stick, cumin seeds, cloves, green cardamom pods, and star anise (optional). Add salt and ¼ teaspoon of vegetable oil.
- Taste the water. It has to be slightly salty, like ocean water. If it's not, add ½ teaspoon of salt. Boil water rapidly for 5 minutes to release the beautiful aroma of the spices.
- Then, add the drained rice and cook until it's 50% cooked. The core of the rice needs to be uncooked. This step only takes about 3-4 minutes. Overcooking the rice will result in a mushy biryani, so pay close attention.
- Refer to the picture under the "Ingredients for boiling rice" in the step-by-step section to see what the rice should look like. Discard the whole spices, except for the cumin seeds and set the parboiled rice aside. Leave it in the colander so it continues to drain.
LAYER THE BIRYANI
Bottom layer (1st layer)
- At the bottom of the heavy pot, add the chicken with its marinade and the blender mixture. Mix well.
- Next, add the fried eggs and fried potatoes (cooked halfway), along with half of the peas and half of the fried red onion. Mix well.
- Add 1 tablespoon of the ghee and the biryani spice powder mix.
- Now add a bit of water. Add enough water to cook the biryani but not so much that the rice becomes mushy. The trick is to add enough water to cover the chicken and potatoes, but you can still see them. So don’t cover them completely. Start with half a cup and work your way up. Refer to the pictures in the step-by-step instructions section. Mix everything really well again.
Middle layer (2nd layer)
- Add the drained rice along with the whole spices for biryani, namely 1 Indian bay leaf, 1 cinnamon stick, 3 green cardamom pods, cumin seeds, cloves, and 1 star anise (optional). Flatten the top of the rice with the back of a spoon.
Top layer (3rd layer)
- Sprinkle the remaining peas and fried red onion on top of the rice. Add the remaining 2 tablespoons of ghee, a dollop here and there spread out all over the rice.
- Next, pour the saffron water all over the top. I like to add an additional slit green chili on top too, but it is optional.
COOK THE BIRYANI
- Once the biryani is layered, set up the cast iron tawa, heavy bottom pot, aluminum foil, pot lid, and cast iron pan, as shown below. Make sure you seal the aluminum foil really well. If you don’t have a cast iron pan, use any heavy pan on top. This whole setup ensures that the steam doesn’t escape, which is important to properly cook the biryani on the stovetop method.
- Set the heat to medium-high. Ideally, the flame should reach all over the bottom (or diameter) of the pot. Cook for exactly 20 minutes. Set a timer!
- When your timer goes off, reduce the flame to the lowest. Cook for exactly 15 minutes. Set a timer again.

- Once your timer goes off, turn off the flame and let your biryani rest, untouched, for 20 to 30 minutes. Don't be tempted to peek at this point because the biryani needs the steam to be trapped to finish cooking.
How to serve
- After 20 to 30 minutes, it is now time to uncover your beautiful work. Garnish with freshly chopped cilantro and serve with chatini pomme d'amour, cucumber salad or raita. ENJOY!
Sharing is caring
If you like enjoyed this list, please share it with your family and friends. I am also on Facebook, please follow my recipe updates there.


Leave a Reply